Blog

Paint Latex Over Oil Based Paint
Blog

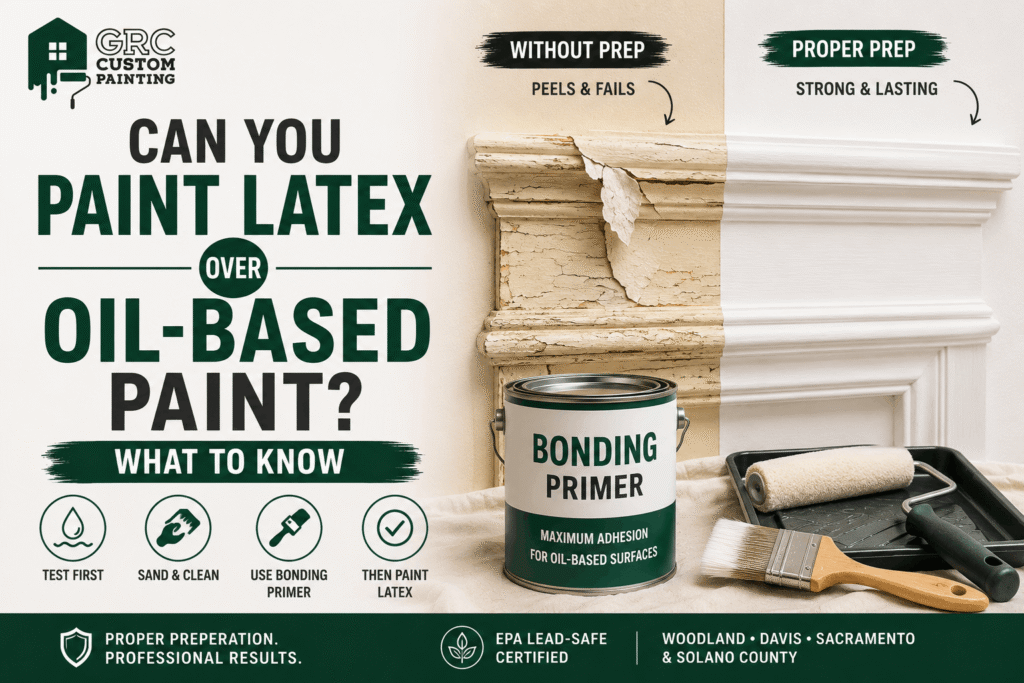
Can You Paint Latex Over Oil Based Paint? What to Know

Yes, you can paint latex over oil based paint, but only with the right preparation, and the preparation is the entire job. Skip it and the new coat will look perfect for a few weeks. Then it starts lifting. On trim you can usually peel a strip off with a fingernail, still intact, like a sticker coming away from glass. This is the most common repaint failure I get called out to fix, and it is almost always avoidable. I am Gerry, and I have been painting homes across Woodland, Davis and Sacramento for twenty-five years. At GRC Custom Painting I do the prep and the finish coats myself, so I have seen exactly what happens when the middle steps get rushed. What Happens If You Paint Latex Over Oil Without Prep? Latex will not chemically bond to a cured oil film. One is water-based, the other solvent-based, and the new coat simply sits on top as a separate layer with nothing gripping it. That is why the failure looks the way it does. The paint does not flake into chips. It comes away in sheets, whole and unbroken, because it never attached at all. Understanding this makes the prep obvious. You are not trying to create a chemical bond, because you cannot. You are creating a mechanical one. Sanding gives the slick oil surface tooth for the next coat to grip. A bonding primer bridges the two incompatible films. Do both and latex over oil paint holds for years. How Do You Know If Your Existing Paint Is Oil or Latex? You cannot tell by looking, and guessing wrong costs you the whole job. Fortunately the test takes about a minute. The Cotton Ball Test Dampen a cotton ball with rubbing alcohol or acetone-based nail polish remover and rub it firmly on a hidden spot, inside a closet jamb or the back edge of a door. If colour transfers onto the cotton, it is latex and you can proceed normally. If nothing comes off, it is oil-based. One tip: use a dark cloth against light-coloured paint so you can actually see the transfer. On white trim a white cotton ball tells you very little. What Else Points to Oil? Oil paint feels harder and glossier under your hand than latex, which has a slightly softer, more rubbery finish. Ambering is the other giveaway. Oil-based whites yellow as they age, so if the trim has a warm cast the walls do not, that is a strong hint. Anything painted before the early 2000s is a reasonable suspect. Plenty of homes around Woodland and Davis still have oil on the trim, doors and cabinets even where the walls went latex decades ago. Is Your Trim Old Enough to Contain Lead? Check this before you pick up any sandpaper, not after. If the home was built before 1978, the oil paint underneath may contain lead. Sanding it releases fine dust that is genuinely hazardous, particularly to young children, and it settles into carpet and vents where it stays. Federal rules require an EPA-certified contractor to disturb lead paint in pre-1978 housing. That is a legal requirement, not a recommendation. I hold that certification, which is why I am comfortable taking on older homes here. There is a practical middle path worth knowing about. You can have a certified contractor handle the sanding, prep and priming, then apply the finish coats yourself. You get the savings without anyone stirring up lead dust in your house. This is one of the places where working with an owner-operated painter genuinely matters. The person who quoted your job is the person doing the risky part of it. How Do You Prepare Oil-Based Paint for Latex? Three steps, and none of them are optional. Nearly every failed repaint I get called to fix skipped the middle one. Clean first. Use a degreaser or a TSP substitute, especially on kitchen trim and cabinets, where a film of cooking grease will stop any primer from bonding. Rinse it properly and let it dry completely. Then dull the surface. Work over the gloss with 120 to 150 grit on flat runs and something finer on detailed profiles. The goal is removing the shine, not removing the paint, you want tooth, not bare wood. Wipe the dust off with a tack cloth when you are done. Then prime. Use a bonding or adhesion primer, not a general-purpose wall primer. Apply a full even coat and respect the drying time on the label rather than the one you would prefer. Can You Use a Deglosser Instead of Sanding? Sometimes, and it is worth knowing about. Liquid deglosser chemically dulls the surface instead of abrading it. That makes it useful on intricate millwork where sanding into every profile is impractical, and on pre-1978 paint where creating dust is exactly what you want to avoid. It is less reliable than sanding on high-gloss oil, though. Test a small area before committing to it. Which Primer Should You Use Over Oil-Based Paint? The primer is doing the real work in this job, so it is the wrong place to save money. Waterborne bonding primers are the everyday choice for interior trim. Low odour, soap-and-water cleanup, plenty of grip for most situations. Oil-based bonding primers give maximum adhesion and stain blocking, which earns their place on very slick surfaces or where old stains would bleed through. The trade-off is strong fumes, real ventilation needs and solvent cleanup. Either way, look for the word “bonding” or “adhesion” on the label. A standard primer will fail here just as surely as no primer at all. Then do something almost nobody mentions: run a test patch. Prime and topcoat a small hidden area, give it a few days, and try to scratch it with a fingernail. Finding a problem on one square foot of doorframe is a far better outcome than finding it on every room in the house. While you are choosing products, the sheen matters too,

Vinyl Siding
Blog

Can You Paint Vinyl Siding? Yes, With Two Big Rules

Yes, you can paint vinyl siding, and it costs a fraction of tearing it off and starting again. Faded, chalky, dated panels can look close to new. But vinyl comes with two rules that no other siding has. The colour has to be light enough, and the paint has to be formulated for vinyl specifically. Break either one and you do not end up with a paint job that fades early. You end up with warped panels. I am Gerry, and I have been painting exteriors around Woodland, Davis and Sacramento for twenty-five years. At GRC Custom Painting I do the prep and the spraying myself, so here is the honest version of what painting vinyl siding involves. Why Is Painting Vinyl Siding Different From Other Siding? Vinyl is PVC, a plastic, and it behaves nothing like wood or fiber cement once paint goes on it. Two properties drive everything. The first is movement, a twelve-foot panel expands and contracts noticeably between a cold morning and a hot afternoon, and rigid paint cracks at the seams when it does. The second is heat. Vinyl softens when it gets hot enough, which turns colour selection into a structural decision rather than an aesthetic one. That is the difference worth holding on to. On wood siding, the wrong paint fails. On vinyl siding, the wrong paint can damage the siding underneath it. Rule One: Why Can’t You Paint Vinyl Siding a Dark Colour? Because dark colours absorb solar heat instead of reflecting it, and vinyl has a temperature limit. A dark panel in full sun can run 20 to 50 degrees hotter than the air around it, and vinyl begins to soften around 165°F. In Central Valley summers, that is not a theoretical number. This is where light reflectance value comes in. LRV is a 0 to 100 scale measuring how much light a colour bounces back higher means lighter and cooler. The working guideline for vinyl is an LRV of 55 or higher. Your paint retailer can tell you the LRV of any colour. Ask before you fall in love with a swatch. Never Go Darker Than the Original This rule is simpler than memorising a number, and it is the one I would actually follow. Match the lightness of your existing siding or go lighter. Even inside a vinyl-safe range, dropping from a factory white to a deep greige raises summer surface temperature substantially. The manufacturer chose that original shade partly for heat reasons. Going darker overrides that decision. What About Vinyl-Safe Dark Colours? The major brands publish vinyl-safe collections, and some include genuinely dark shades formulated to reflect infrared light rather than absorb it. They work, and they reduce the risk considerably. They do not eliminate it. Their performance depends on the right film thickness, which is exactly what goes wrong on a DIY weekend. If you want a dark colour on vinyl, treat that as a reason to hire someone. If you are still weighing shades, I go through what holds up locally in exterior paint colours for Sacramento and Woodland homes. Rule Two: What Paint Should You Use on Vinyl Siding? The paint has to move with the panel, so the binder matters more here than on any other exterior surface. Use a 100% acrylic or urethane-modified acrylic exterior paint that is specifically labelled vinyl-safe. Those formulations stay flexible and stretch with the siding through its daily expansion and contraction. Standard exterior paint goes brittle by comparison. It looks fine for a season, then cracks along the seams and overlaps where the movement concentrates. One practical thing almost nobody mentions: tell the paint counter the surface is vinyl. Some vinyl-safe colours need a specific tinting formula, and asking for the colour by name alone does not guarantee you get the right version of it. If you want the detail on why the binder makes the difference, I cover that in latex vs acrylic paint. Sheen matters here too, a lower sheen hides panel texture and lap lines, which I explain in paint finish types explained. Does Painting Vinyl Siding Void the Warranty? Usually yes, and it is worth checking before you buy anything. Most manufacturers treat painting as an alteration. Factory-coloured vinyl carries its colour through the material, which is why it comes with a long fade-resistance warranty. Paint sits on the surface, so it has a shorter realistic life. The honest way to think about it: if your siding is fairly new and still under warranty, painting is a poor trade, you are giving up decades of coverage for a finish that will need attention sooner. If the siding is older, faded and past that window, the warranty is largely academic. That is when painting becomes the sensible move rather than a compromise. When Should You Replace Vinyl Siding Instead of Painting It? Paint does not fix structural problems, and it is worth being clear about that before anyone spends money. Cracked, brittle, loose or already-warped panels need replacing. Coating them gives you a freshly coloured damaged wall, and the damage keeps progressing. Heavily chalked siding needs a closer look. Some washes back to a sound surface that takes paint well. Some has oxidised too far and keeps releasing that powdery film no matter how much you clean it. If more than a handful of panels are compromised, replacement is the better spend. I would rather say that up front than take the job and watch it fail. When Can You Paint Vinyl Siding in the Central Valley? Spring and fall, realistically. Our summers rule themselves out. The application window for vinyl is roughly 50 to 85 degrees, which around Woodland and Davis removes most of June through September. Painting vinyl in triple-digit heat causes several problems at once. The paint flash-dries before it can level or bond properly, you get lap marks that are hard to correct, and the panel is already expanded to its maximum, so the film cures onto a surface about

Signs Your House Needs Repainting
Blog

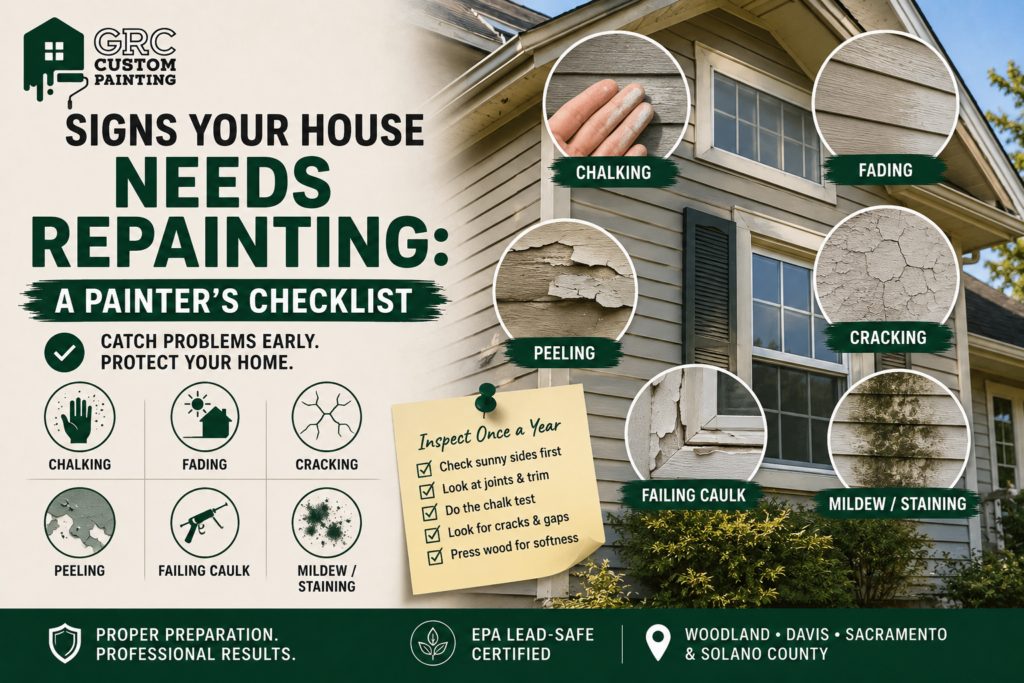
Signs Your House Needs Repainting: A Painter’s Checklist

Paint does not fail overnight. It fails so gradually that you stop seeing it. The house looks the same today as yesterday, then three years have gone by. Most people only notice when something obvious happens, a strip peels off a fascia board, or a neighbour repaints and yours suddenly looks tired. That matters, because paint is not decoration. It is the layer protecting the wood, stucco and trim underneath. Once it stops doing that job, the fix stops being a paint job. I am Gerry, and I have painted exteriors around Woodland, Davis and Sacramento for twenty-five years. At GRC Custom Painting I do the inspections and the work myself, and most of my exterior painting services start with exactly this walk-round. Here is the checklist I use, including the signs that do not mean repainting. How Often Should a House Be Repainted? Most people want a number, so here it is: published guidance puts exterior repaints around seven to ten years. Here is why that number is close to useless on its own. Two identical houses on the same street can be five years apart. Wall orientation, colour depth, siding material and the quality of the last prep all move that timeline more than the calendar does, and choosing exterior colours for Woodland and Sacramento homes covers why darker shades shorten it here. I have seen ten-year-old paint holding up on a shaded north wall and four-year-old paint failing on a west wall of the same house. So stop counting years and start reading the wall. What Are the Signs Your House Needs Repainting? Six are worth knowing, listed roughly in the order they appear around here. That order matters. Most articles list peeling first, because in humid climates moisture damage arrives early. In the Central Valley it is the opposite, UV damage shows up long before anything peels. Chalking Run your hand along the siding on a sunny wall. If it comes away with a fine powdery residue, that is chalking. What you are touching is the binder breaking down and releasing pigment, the film disintegrating from the surface inward. Easiest test: a dark cloth rubbed across a south-facing wall. Cheaper paints chalk sooner because of what is in that binder, which I explain in latex vs acrylic paint. One thing most guides leave out: chalking has to be washed off completely before anything new goes on. Paint over it and the new coat bonds to dust rather than your house, which is how a fresh job starts peeling within a year. Fading, Especially on One Side This is the most useful diagnostic you have, and it takes ten seconds. Compare a south or west wall against a north-facing one. A clear difference in colour means UV has degraded the topcoat past the point of protecting anything. Fading is not just cosmetic. Pigment breaking down under ultraviolet light is the coating losing its shield, and that shield is the reason the paint is there. Darker colours go first. Reds, blues and deep greens can shift noticeably inside five to eight years even with quality paint. Hairline Cracks and Alligatoring Exterior paint is supposed to flex as the substrate expands and contracts. When it stops flexing, it cracks. You can see recent exterior work if you want a look first. Isolated hairline cracks are worth watching. A widespread pattern resembling reptile skin, alligatoring, means the film has failed throughout. Either way, cracks let water behind the paint, and that is when a surface problem becomes a substrate problem. Peeling and Flaking The most obvious sign, and the most urgent. Peeling means adhesion is gone. Water is already underneath, and once the film separates it spreads along the grain faster than people expect. Around here peeling rarely shows up alone. By the time you see it, chalking and cracking have been underway for a while. Failing Caulk Around Windows and Trim This gets overlooked constantly, and it is often the earliest visible sign of all. Caulk seals the joints where materials meet, trim against siding, window frames, fascia edges. Over time it loses elasticity, dries out and pulls away. Look for visible gaps or dried strings hanging loose. Every gap is a direct path for water into the wall. Caulk is cheap to replace early and expensive to ignore. Mildew, Staining or Bare Substrate Showing Dark blotchy patches turn up on north-facing walls and anywhere shaded by trees or blocked from airflow. More serious is bare wood or exposed stucco showing through. At that point the protective layer is not weakening, it is gone. Why Does Paint Fail Faster in the Central Valley? Because our problem is heat and sunlight, not damp. Most advice on this topic is written for humid regions where moisture drives the damage. Here it works differently, and that changes which signs appear and when. Intense summer UV breaks down binder and pigment far faster than a moderate climate does. Our daily temperature swings compound it, the film expands through a hundred-degree afternoon and contracts overnight, year after year. South and west elevations take the worst of both and fail first. I have seen plenty of houses where the shaded side had years left and the west wall was already chalking heavily. Inspect the sunny walls first. They tell you the truth long before the shaded ones do. Timing matters too, which I cover in timing an exterior repaint in California. When Do These Signs Not Mean Repainting? Not every symptom is a whole-house job, and a painter who says otherwise is selling rather than assessing. A single scuff or gouge is a touch-up. One faded trim board is a trim job, not a reason to price the whole exterior. A small peeling patch on one elevation usually has a specific cause, a leaking gutter above it, or a section poorly prepped last time. Fix the cause and the patch, and the rest of the house is fine. The dividing line I use: isolated

Latex vs acrylic paint
Blog

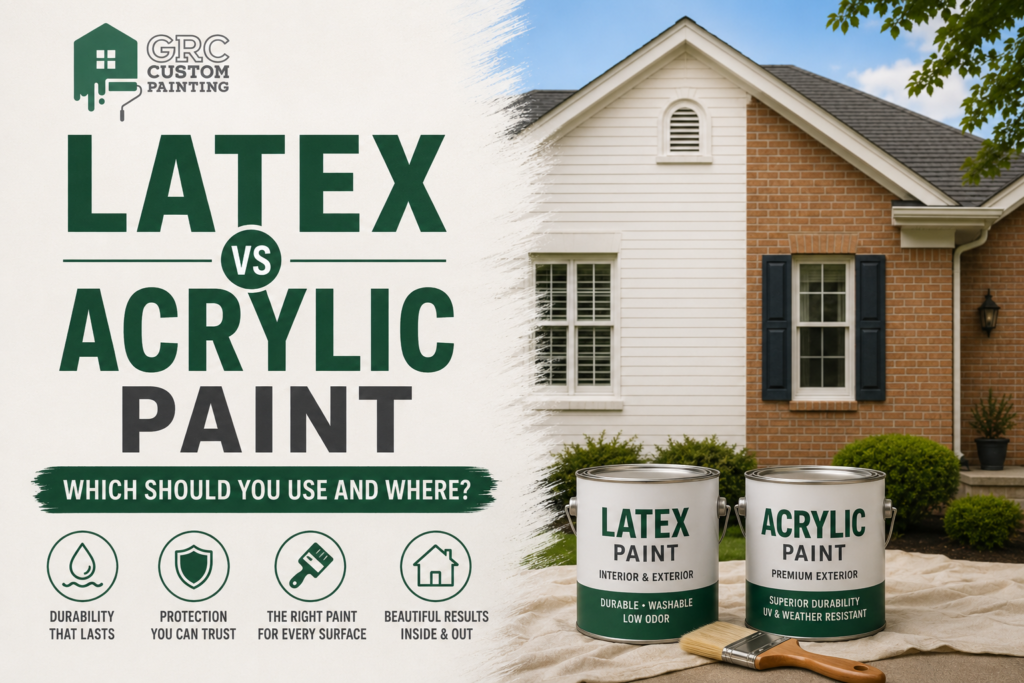
Latex vs Acrylic Paint: Which Should You Use and Where?

Stand in front of the paint shelf long enough and the question arrives. One can says latex, the one beside it says acrylic, and nothing on either label explains what that actually changes. Here is the part almost nobody tells you: the comparison is built on a misunderstanding. Most latex house paint sold today is already acrylic-based. You are usually not choosing between two different things at all. What you are really choosing is the binder inside the can, and on older homes, whether what is already on the wall will even accept it. I am Gerry, and I have been painting homes across Woodland, Davis and Sacramento for twenty-five years. At GRC Custom Painting I buy the paint, prep the surface and roll it myself, so I have no reason to talk you into the expensive can when the cheaper one will do. Is Latex Paint the Same as Acrylic Paint? Not quite, but they overlap far more than the labels suggest. “Latex” in house paint is a technical term for polymer particles suspended in water. It has nothing to do with rubber, and modern latex paint contains no latex at all. The name is a holdover. Both are water-based. Both clean up with soap and water. Both come in the full range of sheens. The real difference sits in the binder, the resin holding the pigment together and gluing it to your wall. Some cans use 100% acrylic resin. Others use a vinyl-acrylic or PVA blend that costs the manufacturer roughly half as much. Both of those get sold as latex paint. Why the Label Does Not Tell You Much? The front of the can is marketing. The information you want is on the back. Find the composition or binder line and look for the words “100% acrylic”. That single phrase separates the two products far more reliably than whether the front says latex or acrylic. If it reads vinyl-acrylic, styrene-acrylic or polyvinyl acetate, you are holding the cheaper resin. That is not automatically wrong, it depends entirely on where the paint is going. Binder is one of two decisions you make at the shelf. The other is sheen, which I cover separately in paint finish types explained. Which Paint Should You Use Inside Your Home? Interior surfaces barely move and never see direct UV, so most of what you pay extra for outside is wasted on drywall. Walls and ceilings do fine on a good standard latex. It flows well and covers in fewer coats, and the flexibility you give up is flexibility the wall was never going to need. Bathrooms and kitchens are worth stepping up. Moisture, steam and regular scrubbing all favour an acrylic or acrylic-fortified formula. Trim, doors and cabinets should be 100% acrylic. These get handled, knocked and cleaned constantly, and they need a harder film than a wall does. When I price an interior painting project, that split is how I spec it, standard on the broad areas, acrylic where the abuse happens. Which Paint Holds Up Better in Central Valley Heat? Outside is where this stops being academic, and our climate makes it sharper than most guides account for. Siding, stucco and trim expand and contract every day. Our summers run past a hundred degrees for weeks, then drop hard overnight. Add relentless UV and you get two forms of stress hitting the same paint film at once, movement working the surface, and ultraviolet light breaking down the binder holding it together. 100% acrylic wins outright out here, and it is not close. The acrylic binder flexes instead of splitting, grips weathered surfaces better, and resists chalking, that powdery residue on your hand when you brush against tired siding. South and west elevations always fail first. Every time, on every house. Darker colours take it hardest, which is part of why I go into shade selection in best exterior paint colours for Sacramento and Woodland homes. There is an honest exception. On a shaded elevation with sound siding and a tight budget, a quality exterior-grade latex is not a disaster. It just will not last as long.  Timing matters as much as product, which I cover in the best time of year to paint your house exterior in California. My exterior painting services page explains what a full repaint involves. Can You Paint Acrylic Over Latex? Yes, in most cases. Both are water-based, so they are compatible. Three conditions apply. The existing coat has to be clean, sound and dull. A glossy surface needs scuff-sanding so the new paint has something to grip.  On an exterior, chalky or failing paint needs washing and a bonding primer first. The reverse works too, but you are covering the better product with the weaker one. What If Your Trim Was Painted With Oil-Based Paint? This is the question that actually costs people money, and it matters far more than latex versus acrylic. Neither will bond to oil-based paint. Apply either one directly over oil and it may look fine for a few weeks, then peel off in sheets, sometimes in strips you can lift with a fingernail. Older homes around Woodland and Davis frequently have oil on the trim, doors and cabinets, even where the walls were switched to latex decades ago. It was standard through the 1970s and 80s and lingered into the early 2000s. How to Test What You Already Have? Dampen a cotton ball with rubbing alcohol or acetone-based nail polish remover and rub a hidden spot, inside a closet jamb works well. Use a dark cloth on light paint so you can see the transfer. If paint comes off onto the cotton, it is latex and you can proceed normally. If nothing comes off, it is oil-based, and the surface needs scuff-sanding plus a bonding primer before any water-based coat goes on. One serious caution. If your home predates 1978, that oil paint may contain lead, and sanding it releases hazardous dust. Federal rules require an EPA-certified contractor for

Blog

Does Paint Expire? How Long Paint Lasts and When It Goes Bad

If you’ve ever pulled a dusty paint can out of the garage and wondered whether it’s still worth opening, you’re not alone. Homeowners around Woodland and Sacramento ask me this all the time, usually right before a touch-up they’ve been putting off for months. After 25 years painting homes in Yolo, Sacramento, and Solano County, I’ve opened plenty of cans that looked fine on the outside and were completely useless inside. Here’s what I’ve learned about paint shelf life, the warning signs of expired paint, and how to make your leftover cans last as long as possible. Does paint really expire, or is it just old? Yes, paint expires. It doesn’t carry a stamped expiration date like a carton of milk, but the chemistry inside a paint can slowly breaks down the moment it’s manufactured, and much faster once air gets in. There’s a real difference between paint that is simply old and paint that has actually gone bad. A can sealed tightly and kept in stable temperatures can still spray or roll beautifully years later. A can that spent one Central Valley summer sweating in an uninsulated garage can be ruined in a matter of months. Whether your paint has expired depends on the type of paint, how well the can was sealed, where it’s been stored, and how old it was when you first bought it. How long does paint last after opening? Every paint type has its own shelf life, and the numbers change dramatically once the seal is broken. Below is what I typically see in the field with the products I use on client homes. Does latex paint go bad? Latex and acrylic paints, the water-based products used on most interior walls, last up to 10 years unopened if the can stays sealed and cool. Once opened and resealed, expect two to five years of usable life. Latex is the most temperature-sensitive category; a single freeze cycle can permanently ruin it. How long does oil-based paint last? Oil-based paints hold up longer than latex. An unopened can stored properly can stay usable for around 15 years, and an opened can typically remains workable for two to five years. Higher-sheen finishes like semi-gloss and gloss generally outlast flat and matte formulas. How long does spray paint last? Aerosol spray paint has a shorter life than either latex or oil. Most cans start losing pressure and separating around the three-year mark, even unopened. If you buy spray paint for a project, plan to use it within the year rather than storing it long-term. What about chalk paint and milk paint? Chalk paint lasts roughly one to five years and often thickens rather than spoiling. You can sometimes revive it with a splash of water. Milk paint is the shortest-lived by far. Once mixed, it stays usable for one to two days at room temperature, or about a week refrigerated. What are the signs paint has gone bad? You don’t need lab equipment to tell whether a can is dead. Open the lid, look inside, and give it a stir. Bad paint tells on itself quickly. The clearest warning sign is smell. Fresh paint has a familiar chemical odor, but expired paint smells sour, rancid, or like spoiled food, which is bacteria growing inside the can. If you catch a whiff of that, the can is finished. Next, look at the consistency. Good paint stirs back into a smooth, uniform liquid after a minute or two. Expired paint stays lumpy, gritty, or rubbery no matter how long you mix it, and often shows a thick skin or mold film on top that won’t blend back in. Finally, watch for rust on the inside rim of the can. Rust flakes get suspended in the paint and leave streaks or specks on the wall that no amount of rolling will fix. Why does paint expire faster in the Sacramento Valley? Local climate matters more than most homeowners realize. The Sacramento Valley cycles between triple-digit summer heat and cold, damp winters, and both extremes are hard on stored paint. Uninsulated garages in Woodland and West Sacramento routinely climb past 110°F in July and August. That heat accelerates the chemical breakdown of latex binders and can cause oil-based products to thicken or separate. In winter, unexpected cold snaps can freeze water-based paint stored near an exterior wall or in a shed, and once latex freezes and thaws, it is finished. That’s why I always recommend storing leftover paint inside the house, in a closet, a laundry room, or a conditioned utility area, rather than in the garage. The few square feet you give up will pay for themselves the next time you need a touch-up. How can I extend the life of leftover paint? Storage habits are the single biggest factor in how long your paint lasts, and small adjustments go a long way. The goal is to keep air, temperature swings, and contamination out of the can. Wipe the rim clean before you seal the lid so the can closes airtight, and tap the lid down with a rubber mallet rather than a hammer to avoid warping the seal. Store the can upside down for short-term storage, since the paint itself forms a seal against the lid, but only if you know the lid is on tightly. If you’ve used most of a gallon, transfer what’s left into a smaller glass jar or a clean plastic container. Less air in the container means slower oxidation and longer life. Label every container with the color name, sheen, brand, room it was used in, and the date you opened it. Your future self will thank you. Can I still use expired paint on my house? For a full room or an exterior repaint, no. Expired paint doesn’t level properly, dries with a chalky or streaked finish, and often peels or flakes within a year. The labor of applying it, whether you’re hiring a painter or doing it yourself, is worth far more

Paint Finish
Blog

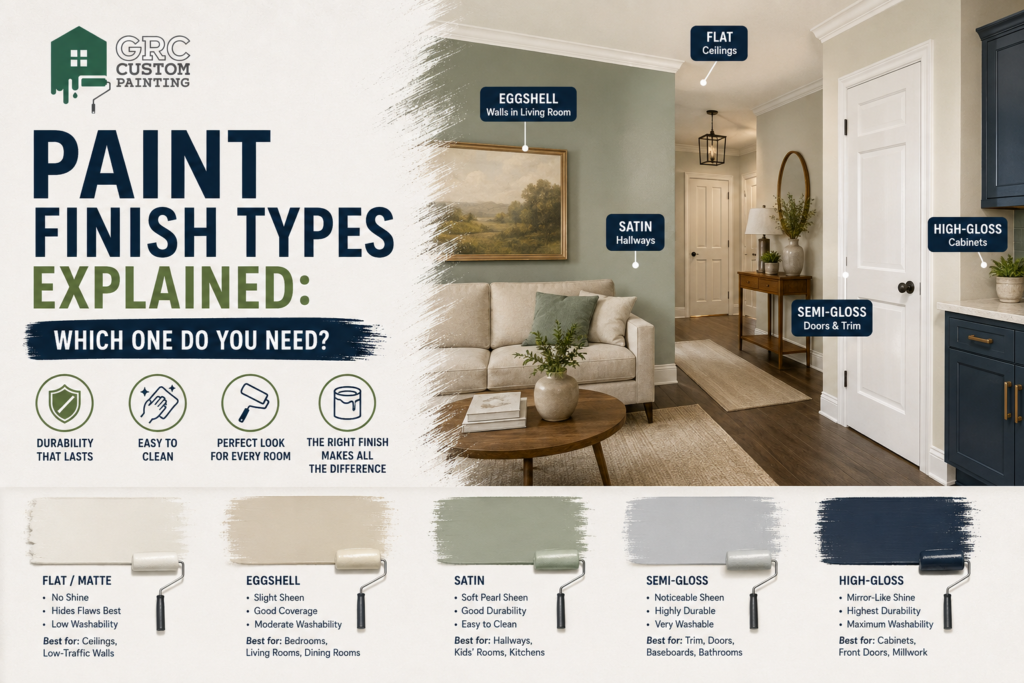
Paint Finish Types Explained: Which One Do You Need?

Most people walk into a paint store with the colour already decided. Then someone asks what sheen they want, and the whole thing stalls. It is a fair place to get stuck. Paint finish types affect how durable the wall is, how easily it cleans, how much of your drywall’s history shows, and whether you can ever touch up a scuff without repainting the room. Paint manufacturers do not make it simpler. One brand lists nine finishes. Most homes need three or four. I am Gerry, and I have been painting interiors and exteriors around Woodland, Davis and Sacramento for twenty-five years. At GRC Custom Painting I am the one who prices the job and the one who rolls it, so I have no reason to sell you a finish you do not need. Here is how I actually pick. What Is Paint Sheen, and Why Does It Matter? Sheen is how much light the dried paint reflects. It is not a coating over the colour, it comes from the ratio of binder to pigment in the can. More binder means more shine, a harder film, and better washability. It also means the surface underneath has nowhere to hide. That is the trade-off governing every decision in this article: shine buys you durability and costs you forgiveness. Everything below follows from that one sentence. Sheen changes how colour reads, too. The same soft grey looks lighter and cooler in satin than in flat, because more light is bouncing back at you. Sample on the actual wall before committing. What Are the Main Paint Finish Types? Five finishes cover nearly every residential job. Names differ by brand, and some of those extra options are marketing rather than new categories velvet, pearl and low-lustre all sit between the standard five rather than adding to them. Match on gloss level, not on the name printed on the label. Finish Shine Hides flaws Washability Best for Flat / Matte None Best Lowest Ceilings, low-traffic walls, textured drywall Eggshell Slight Good Moderate Bedrooms, living rooms, dining rooms Satin Soft pearl Fair Good Hallways, kids’ rooms, kitchens Semi-Gloss Noticeable Poor High Trim, doors, baseboards, bathrooms High-Gloss Mirror-like Worst Highest Cabinets, front doors, feature millwork Flat and Matte: What Is the Difference? Not much. The distinction is largely branding, though matte usually carries slightly more binder and takes a gentle wipe better than true flat. Both are non-reflective, and both hide wall imperfections better than anything else you can buy. The drawback is real. Flat scuffs easily and cannot be spot-cleaned, rubbing at a mark tends to burnish it and make things worse. When Should You Use Eggshell or Satin? These two cover most of the walls in a typical house. Eggshell has a slight sheen and suits calm, low-traffic rooms, bedrooms, formal living rooms, dining rooms. It cleans better than flat while still forgiving minor drywall flaws. Satin has a soft pearl-like sheen and belongs where hands, pets and cleaning happen. Hallways, kids’ rooms and kitchen walls are its natural home. The catch with satin is that it shows roller marks and surface flaws that eggshell hides. If the drywall is not in good shape, satin will tell everyone. Is Semi-Gloss or High-Gloss Better for Trim? Semi-gloss is the standard for trim, doors, baseboards and casing. It is durable, washable, and its shine separates the millwork from the wall visually. High-gloss goes on cabinets and front doors where you want a near-lacquer result. It is unforgiving of both the substrate and the person applying it, every brush mark and bit of raised grain shows. Rarely a sensible DIY finish. Which Paint Finish Is Best for Each Room? Room function decides sheen more than taste does. I look at moisture, then traffic, then the condition of the walls, in that order. Kitchens take satin on the walls. It handles grease and wiping without turning the room into a mirror. Bathrooms are where I disagree with the standard advice. Semi-gloss walls are a holdover from before satin formulations improved. In a bathroom with a working extractor fan, satin has plenty of moisture resistance and looks far better. Bedrooms and formal living rooms suit eggshell. They are low-traffic, and the softer finish makes the room feel calmer. Hallways and stairwells need satin. These are the highest-contact surfaces in any home and they get scrubbed the most. Ceilings take flat, always. A ceiling is a wide, poorly-lit plane where every seam and texture inconsistency waits to show, and any sheen will find them. Trim, doors and cabinets take semi-gloss or high-gloss, for the durability and the visual separation from the walls. If you are pulling a whole interior painting project together, this contrast is what makes it read as finished rather than flat. Which Paint Finish Hides Wall Imperfections Best? Flat wins outright, with eggshell a clear second. The reason is physics. Light travelling across a wall at an angle rakes over every seam, patch and nail pop, and a reflective surface throws that back at you. Absorb the light instead and the flaws largely disappear. This matters a great deal around here. A lot of the housing stock in Woodland and Davis is 1950s through 1970s ranch, and those walls have had decades of settling, patching and texture repair. Putting satin on them is asking for trouble. Why Does Touch-Up Paint Look Shiny? This is the question I get most often after a job, and almost nobody covers it before you choose a finish, which is when it matters. A touch-up can match the colour perfectly and still look wrong. Colour and sheen are two different things, and only one comes out of the can. Sheen depends on how the surface absorbed the paint, how it was applied, and whether the wall is carrying a full two coats. Dab fresh paint onto a spot and it often dries with a slightly different reflectance than everything around it. That is flashing, and it shows up worst at an angle

Limewash vs Whitewash
Blog

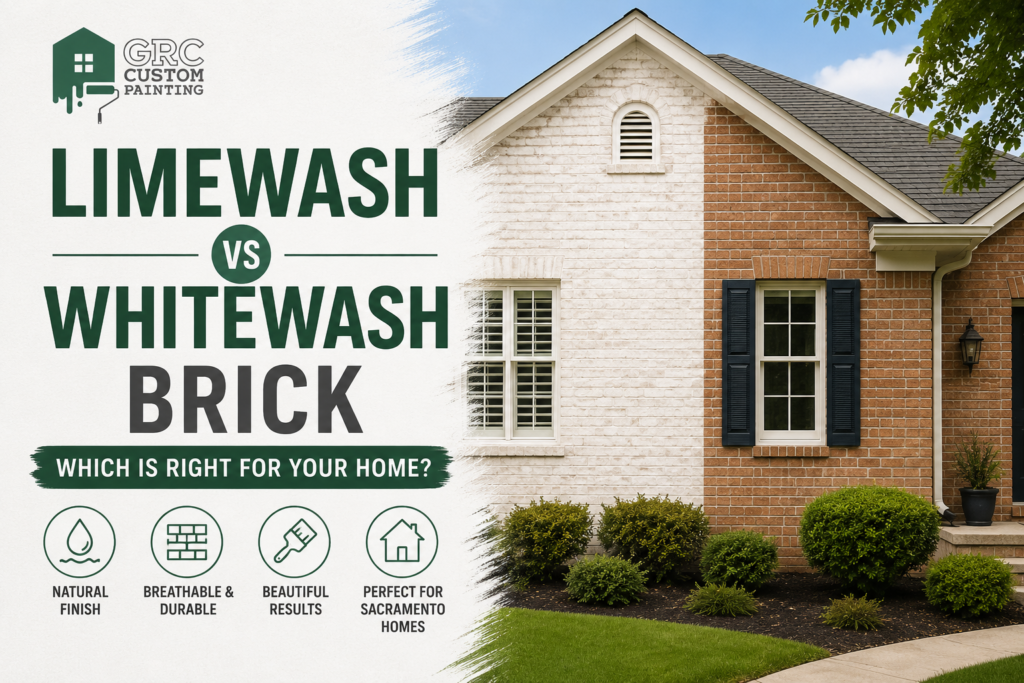
Limewash vs Whitewash Brick: Which Is Right for Your Home?

Dated brick is one of the most common things homeowners ask me about. The house is solid, the masonry is fine, but that peachy red or dark rust colour makes the exterior feel decades older than it is. Two options come up straight away, and they sound like the same thing. They are not. Limewash and whitewash produce different finishes, last different lengths of time, and commit you to very different levels of permanence. I am Gerry, and I have prepped and coated masonry for twenty-five years across Woodland, Davis and the greater Sacramento area.  At GRC Custom Painting I handle every project personally, which means I am the one looking at your brick and the one coating it. If you already know you want it refreshed, you can see my exterior painting services, but read this first, because choosing the wrong finish is expensive to undo. What Is Limewash, and How Does It Work on Brick? Limewash is one of the oldest masonry coatings there is, slaked lime, meaning limestone fired and then hydrated, mixed with water and sometimes a mineral pigment. What makes it different from paint is where it ends up. Limewash soaks into the porous surface of the brick rather than forming a film across it. Once on the wall, the calcium hydroxide reacts with carbon dioxide in the air and hardens back into a mineral layer, effectively becoming part of the brick face. That is why limewash stays breathable, the masonry can still release moisture, which matters on older brick. It also ages in a way paint never does. Limewashed brick develops a chalky, matte patina and erodes gently, so it softens rather than fails. Some people love that weathered European look; others find the lack of uniformity frustrating, and it is worth being honest about which camp you fall into. Colour range is the real limitation white and a narrow band of earth tones. It is low in VOCs, though, which matters with children or pets in the house. What Is Whitewash, and How Is It Different? Whitewash is diluted paint, roughly a half-and-half mix of water and latex or acrylic, brushed on thin so the brick’s texture and variation still read through. The critical difference is that whitewash sits on top of the brick, forming a thin, semi-transparent film rather than penetrating it. That film is where its advantages come from. The finish is smoother and far more uniform, the colour range is effectively unlimited, and it will go over brick that has already been painted. It also wears differently. Being a film, whitewash can chip or peel at the end of its life instead of eroding. On older, softer brick there is a real moisture-trapping concern, which is why I lean toward a breathable mineral paint over standard latex on original masonry. Limewash vs Whitewash Brick: What Are the Real Differences? Most articles define both finishes and stop there. Here is the side-by-side people actually want when they search the difference between limewash and whitewash. Limewash Whitewash Made from Slaked lime and water Diluted paint and water How it bonds Penetrates the brick Sits on the surface Finish Chalky, matte, textured Smoother, more uniform Breathability Vapor-permeable Forms a film Colour range White and earth tones Effectively unlimited Over painted brick? No Yes Reversible? Largely, by power washing Difficult Best suited to Unpainted brick, aged look Painted brick, fireplace surrounds The line that decides most projects is the one about painted brick. Limewash needs raw, porous masonry to bond with, so if yours has already been painted, the choice makes itself. How Long Does Limewash Actually Last on Brick? Published figures run from five years to thirty, which is not helpful when you are planning. The spread is real, and it comes down to four things. The first is preparation. Limewash on brick that was properly cleaned and left unsealed lasts far longer than limewash rushed onto a dirty wall. The second is coat count. Thin coats applied with a natural bristle brush, each cured before the next, build a finish that holds. One heavy coat does not. The third is exposure. South and west elevations take the worst of the sun, and that is where fading shows first. The fourth is maintenance. Limewash is meant to be touched up rather than replaced, and a recoat every few years extends it for decades. For exterior brick in this climate, plan on refreshing in the five to ten year range. Whitewash holds its look longer up front, then fails more visibly, a film chipping looks worse than lime chalking. What Does It Cost to Limewash or Whitewash Brick? Published national figures put professional limewashing and whitewashing in a broadly similar range per square foot, with most whole-house projects landing in the low thousands. That surprises people, because limewash materials are cheap. The cost sits in labour — thin coats and proper drying time between them cannot be rushed. What moves the number most is neither product. It is the condition of the brick and the prep it needs: cleaning, mortar repair, and how much of the wall is reachable without staging. Can You Remove Limewash or Whitewash Later? This is the question almost nobody addresses, and for an exterior decision it should carry real weight. Limewash can generally be removed by power washing, especially in the first stretch after application. It is not always perfect on deeply porous brick, but it is achievable without damaging the masonry. Whitewash is paint, so removal means chemical stripping or media blasting. Both are expensive and both risk damaging the brick face. If you are unsure about the look, that difference alone is the strongest argument for limewash. Which One Is Right for Your Brick? The brick you already have narrows this down more than personal taste does. Here is how I sort it on site. Limewash Is the Better Fit If Your brick is unpainted, you want a soft aged look rather than a crisp modern

Scroll to Top