
owner operated contract
Interior Painting

Why Hire an Owner-Operated Painting Contractor

When it comes to improving your home or commercial property, choosing the right painting contractor makes all the difference. While large painting companies may seem appealing, many homeowners are discovering the benefits of working with an owner-operated painting contractor. From personalized service to better quality control, owner-operated businesses often deliver a smoother and more reliable experience. If you are planning an interior or exterior painting project, here is why hiring an owner-operated painting contractor can be one of the smartest decisions you make. Personalized Attention for Every Project One of the biggest advantages of hiring an owner-operated painting contractor is the level of personal attention you receive. Unlike large companies where projects are often delegated to multiple supervisors or subcontractors, the owner is directly involved in the work. This means: Clear communication from start to finish Accurate project updates Better understanding of your expectations Faster response to questions or concerns The owner has a personal reputation tied to every job, so customer satisfaction becomes a top priority. Higher Quality Workmanship Owner-operated painting contractors usually take great pride in their craftsmanship. Since their business reputation depends heavily on referrals and reviews, they focus on delivering high-quality results on every project. You can often expect: Detailed surface preparation Professional painting techniques Clean and organized work areas Careful attention to finishing touches Because the owner is actively supervising or completing the work, quality control is typically much stronger compared to larger companies. Better Communication Throughout the Process Communication problems are common when working with large painting companies. Messages may pass through office staff, project managers, and crews, leading to confusion or delays. With an owner-operated painting contractor, communication is usually direct and simple. You speak directly with the person responsible for the project, making it easier to discuss: Paint colors and finishes Scheduling Budget concerns Project timelines Special requests This direct communication often leads to a smoother and stress-free experience. Cost-Effective Painting Services Large painting companies often have higher overhead costs, including office staff, advertising expenses, and multiple management layers. These extra costs can increase the price of your painting project. Owner-operated contractors typically run leaner businesses, which allows them to offer competitive pricing without sacrificing quality. You often receive: Fair and transparent estimates Better value for your investment No hidden corporate fees For homeowners looking for affordable painting services with professional results, owner-operated businesses are often an excellent choice. Greater Accountability When the business owner is directly involved in your project, accountability improves significantly. There is no passing blame between employees or subcontractors. An owner-operated contractor is more likely to: Arrive on time Stay committed to deadlines Address concerns quickly Ensure the project meets expectations Their reputation depends on customer satisfaction and positive referrals, so they are motivated to provide exceptional service. Flexible and Customized Service Every property is different, and owner-operated painting contractors are often more flexible when it comes to meeting your specific needs. They can provide customized recommendations based on your goals, budget, and property condition. Whether you need: Interior house painting Exterior painting services Cabinet refinishing Deck staining Commercial painting An owner-operated contractor can often tailor the project to fit your exact requirements. Strong Local Reputation Many owner-operated painting contractors rely heavily on local word-of-mouth referrals and repeat customers. This means they are highly motivated to maintain a strong reputation in the community. Before hiring, you can often review: Local customer testimonials Online reviews Before-and-after project photos Personal recommendations from neighbors A strong local reputation is usually a good sign of consistent service and reliable workmanship. Reliable Project Management Since the owner is personally involved, projects are often managed more efficiently. There is usually less confusion about scheduling, materials, and daily progress. This can help ensure: Projects stay on schedule Work areas remain clean Materials are properly selected Painting crews stay organized Efficient project management can make a major difference in the overall experience. Long-Term Customer Relationships Owner-operated painting contractors often focus on building long-term relationships instead of simply completing one-time jobs. They want customers to return for future projects and recommend their services to friends and family. This customer-first mindset often leads to: Better overall service Honest recommendations Dependable support after project completion Greater trust and reliability Final Thoughts Hiring an owner-operated painting contractor offers many advantages, including personalized service, better communication, higher quality workmanship, and greater accountability. Whether you are planning a residential or commercial painting project, working directly with the business owner can provide a more reliable and satisfying experience. If you value professionalism, attention to detail, and honest service, an owner-operated painting contractor may be the ideal choice for your next painting project.

right time to paint home
Exterior painting

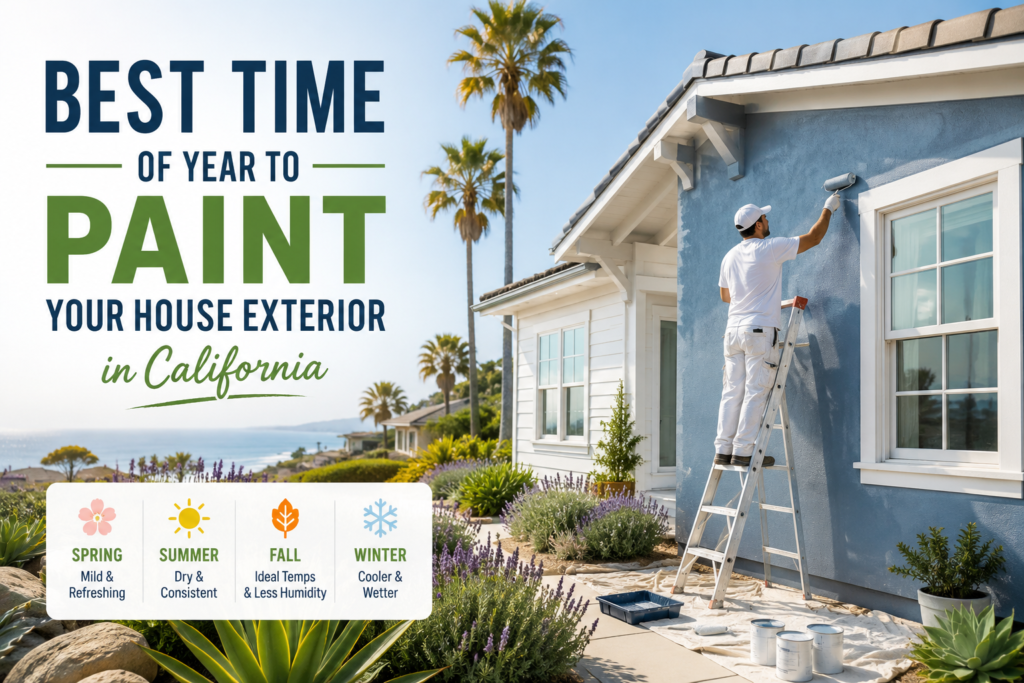
Best Time of Year to Paint Your House Exterior in California

California is one of the best states in the country for exterior painting long dry seasons, mild winters, and predictable weather patterns make it possible to paint outdoors almost year-round. But “almost” is the key word. Even in Sacramento and the Central Valley, timing your exterior paint project correctly makes a significant difference in how long the paint lasts and how good it looks. This guide covers everything you need to know about timing your exterior paint project in California — from ideal temperature windows to the specific seasonal risks that can ruin an otherwise perfect paint job. The Short Answer: Spring and Fall Are Best If you want the simple version: late spring (April through June) and early fall (September through October) are the ideal windows for exterior painting in Sacramento and the surrounding areas. Both seasons offer: Mild temperatures between 50°F and 85°F Low humidity Minimal rain risk Long daylight hours for full-day work That said, California’s climate is forgiving enough that summer and winter projects are often viable with the right precautions. Let’s break down each season. Season-by-Season Guide for Sacramento and the Central Valley Spring (March – June): The Best Season Spring is the single best time to paint the exterior of a California home. Temperatures are consistently in the comfortable range for paint application and curing, rain has typically tapered off by April, and the brutal summer heat hasn’t arrived yet. Why spring works so well: Paint manufacturers specify an ideal application temperature range, typically between 50°F and 90°F. Sacramento’s spring temperatures sit comfortably in this window for most of the day. Paint applied in spring also has weeks of dry, moderate weather to cure before the summer sun arrives. What to watch for: March can still bring late-season rain in Sacramento. If your project starts early in spring, keep an eye on the forecast and plan around wet days. Paint should never be applied to wet or damp surfaces moisture trapped under a paint film causes bubbling and peeling. Best months: April, May, early June Summer (July – September): Possible, With Caution Sacramento summers are hot, consistently above 95°F and often reaching 105°F or higher during heat waves. This creates specific challenges for exterior painting. The heat problem: When it’s too hot, paint dries too quickly. This sounds like it would be a good thing, but it actually causes problems. Paint that dries before it has time to properly level and bond creates a brittle film that cracks sooner, shows brush marks more prominently, and doesn’t adhere as well to the surface. High heat also causes lap marks visible lines where sections of paint overlap, because the first section dries before the painter can blend the next. How to work around it: Experienced painters adjust their approach in summer. Work begins early often at 6 or 7 AM to take advantage of the cooler morning temperatures. The hottest walls (those facing south and west) are painted in the morning or early afternoon before direct sun hits them. Painting stops by early afternoon on the hottest days. The north and east-facing sides of a home are actually fine to paint in the afternoon during summer, as they don’t receive direct afternoon sun. Best summer strategy: Start at dawn, work in sections, avoid painting in direct sun above 90°F. Fall (September – November): Excellent Choice Early fall is nearly as good as spring for exterior painting. September through October in Sacramento offers warm days, cool nights, minimal rain, and stable conditions. Fall painting has one particular advantage: paint applied in fall has all of winter to fully cure and harden before it faces the stress of another California summer. Some professional painters consider this the strongest paint job applied in moderate conditions, cured through a mild winter, fully hardened by the following spring. What to watch for: As you push into November, daytime temperatures start dropping and nights get cold. Paint applied late in the day may not fully cure before temperatures drop below 50°F overnight. This can cause the paint to fail. Check nighttime lows and ensure temperatures will stay above 50°F for at least 8 hours after application. Best months: September, October, early November Winter (December – February): Usually Not Recommended Winter is the most challenging season for exterior painting in California, though it’s not impossible. Sacramento’s mild winters — compared to most of the country, mean exterior painting is sometimes feasible on warm, dry days. The main risks: Rain is the obvious concern. Water on a painted surface before it’s cured is a guaranteed problem, it causes runs, streaks, and in severe cases complete adhesion failure. Sacramento’s rainy season peaks in January and February, making those months generally unsuitable for exterior projects. Cold temperatures are the other issue. Below 50°F, most latex paints won’t form a proper film. The paint may look fine going on but will crack and peel within months once temperatures swing. When winter painting works: On sunny, dry days between storms, when daytime temperatures reach the 55–65°F range, exterior painting is possible. This is more common in December than January or February. If you have a project that must happen in winter, check a two-week forecast, pick a warm window, and ensure the surfaces are completely dry. Best approach: Wait for a dry stretch with 55°F+ daytime temps and well above 50°F nighttime lows. Temperature Rules Every Homeowner Should Know Regardless of season, these temperature guidelines apply to virtually all exterior latex paints: Minimum application temperature: 50°F (some specialty paints go to 35°F, but standard latex requires 50°F) Maximum application temperature: 90°F (above this, most paints dry too quickly for proper adhesion) Minimum surface temperature: Also 50°F, even if the air is warm, a surface in shade may be cooler than you think Minimum nighttime temperature (8 hours post-application): 50°F this is critical and often overlooked Humidity: Below 70% is ideal. Very high humidity slows drying time and can cause sheen issues on flat surfaces. How California’s Climate

stain wood
Exterior painting

How Often Should You Stain An Outdoor Wooden Deck?

Introduction Your outdoor deck is one of the hardest-working surfaces around your home. Rain, UV rays, foot traffic, furniture, and seasonal temperature swings all take a toll on the wood over time. Staining is one of the most effective ways to protect it — but stain too rarely and the wood degrades; stain too often and you waste time and money. So how often should you stain an outdoor wooden deck? The short answer: every 2 to 3 years for most decks, but the real answer depends on several key factors. This guide walks you through everything you need to know to create the right maintenance schedule for your specific deck.   Why Deck Staining Matters Deck stain is not just a cosmetic treatment — it serves as a protective barrier against: Moisture penetration, which causes warping, swelling, and rot UV radiation, which breaks down wood fibers and causes graying and cracking Mold and mildew growth, especially in humid climates Foot traffic wear, which erodes the surface layer over time   Without regular staining, an untreated wood deck can begin to deteriorate within just a few years, leading to costly repairs or full replacement.   The General Rule: How Often to Stain a Deck As a baseline, most deck care professionals recommend the following schedule:   Deck Condition Recommended Staining Frequency New, unsealed deck After 1 year, then every 2–3 years Previously stained deck (good condition) Every 2–3 years High-traffic or sun-exposed deck Every 1–2 years Covered or shaded deck Every 3–5 years Hardwood deck (e.g., Ipe, teak) Every 1–2 years Softwood deck (e.g., pine, cedar) Every 2–3 years   These are starting points. Always let the actual condition of your deck guide your decision.   Factors That Affect How Often You Need to Stain 1. Wood Type Not all deck wood is the same. The species of wood plays a major role in how quickly it absorbs moisture and breaks down without protection. Softwoods like pine, fir, and spruce are more porous and absorb stain readily, but they also lose protection faster — typically requiring staining every 2–3 years. Cedar and redwood are naturally resistant to moisture and insects, making them more durable. They generally need staining every 2–4 years. Hardwoods like Ipe, teak, and mahogany are extremely dense and slow to absorb stain, but their natural oils break down over time. They typically need re-staining every 1–2 years. Pressure-treated lumber is designed to resist rot and insects, but still needs stain for UV and moisture protection. Stain every 2–3 years.   2. Type of Stain Used The type of stain you apply dramatically affects how long the protection lasts. Transparent stains show the natural wood grain but offer the least UV protection. They wear fastest and typically need reapplication every 1–2 years. Semi-transparent stains balance aesthetics and protection. They last 2–3 years under normal conditions. Semi-solid stains provide better UV protection and hide minor imperfections. Expect 3–4 years of coverage. Solid stains act almost like paint and offer the strongest protection — lasting 4–5 years. However, they can peel over time. Oil-based stains tend to penetrate deeper and last longer than water-based (latex) stains.   3. Climate and Weather Exposure Where you live has an enormous impact on how quickly stain breaks down. Hot, sunny climates: UV rays are the biggest enemy of deck stain. If your deck is in direct sunlight most of the day, plan on staining every 1–2 years. Rainy or humid climates: Constant moisture accelerates mold growth and causes the stain to peel or fade faster. Re-stain every 2 years. Freeze-thaw cycles: In cold climates, repeated freezing and thawing can crack the stain film. Re-stain every 2 years. Mild, moderate climates: You may be able to stretch your staining cycle to every 3–4 years.   4. Deck Location and Exposure South-facing decks receive the most sun exposure and will fade and crack faster. Covered or pergola-shaded decks are protected from direct rain and UV, significantly extending stain life. Decks near trees or water are more susceptible to organic debris, algae, and moisture.   5. Foot Traffic and Use A busy family deck that sees daily use, outdoor furniture, grills, and kids’ toys will wear down the surface stain much faster than a lightly used deck. High-traffic areas — like the stairs, main seating area, and entry points — may need spot treatment more frequently.   7 Signs Your Deck Needs Staining Now Don’t wait for a set calendar date if your deck is already showing signs of wear. Look for these warning signals:   Water no longer beads on the surface — Do the splash test: sprinkle water on the deck. If it soaks in immediately rather than beading up and rolling off, the stain is depleted. Fading or graying color — UV rays break down the stain’s pigment. A grayish, washed-out appearance signals unprotected wood. Peeling or flaking — Particularly common with solid stains, peeling means moisture has gotten underneath and the barrier has failed. Cracking or splitting wood — Dry, cracked wood is absorbing and releasing moisture without adequate protection. Visible mold or mildew — Black or green spots indicate moisture is sitting in unprotected wood fibers. Rough, splintery texture — UV degradation breaks down surface wood fibers, leaving a rough texture that can snag bare feet. Stain is more than 3 years old — Even if it looks okay, older stain may no longer be providing adequate protection.   How to Test Whether Your Deck Needs Staining The water bead test is the easiest and most reliable method: Clean a small section of your deck with water and let it dry completely. Sprinkle a few drops of water onto the surface. If the water beads up — the stain is still intact and protecting the wood. If the water soaks in within 30 seconds — the stain has worn away and it’s time to re-stain.   When Should You NOT Stain Your Deck? Timing matters as much as frequency. Avoid

interior paint colors
Interior Painting

15 Modern Interior Paint Colors That Make Any Home Look Expensive

Choosing the right paint color is a little like choosing the perfect outfit. Even a simple room can suddenly look polished, elegant, and incredibly high-end when the color palette feels intentional. Interior designers in 2026 are moving away from cold, sterile whites and embracing warmer, richer, and more grounded tones that make homes feel luxurious without requiring a massive renovation budget. Current trends show that earthy greens, warm neutrals, moody charcoals, creamy whites, and deep jewel-inspired shades are dominating modern interiors because they create depth, comfort, and sophistication. The best part? Paint is one of the cheapest ways to completely transform a space. You do not need marble floors or designer furniture to create an expensive-looking home. Sometimes all it takes is the right wall color paired with natural lighting, layered textures, and smart styling. Whether you are redesigning a living room, upgrading your bedroom, or preparing your home for resale, these modern paint colors can instantly elevate your interiors. Why Paint Color Has Such a Huge Impact on Luxury Design Walk into a luxury hotel lobby or a professionally designed penthouse, and you will immediately notice something interesting. The colors never feel random. High-end interiors rely heavily on carefully selected paint colors because color controls mood, depth, warmth, and perception. A cheap-looking room often has overly bright, flat, or outdated colors that clash with lighting and furniture. Expensive interiors, on the other hand, feel balanced and layered. The walls quietly support the entire design rather than screaming for attention. Interior design trends in 2026 are strongly focused on comfort-driven luxury. Designers are shifting away from icy whites and harsh gray tones because homeowners now want spaces that feel warm, calming, and natural. According to recent design reports, warm neutrals, olive greens, earthy taupes, and creamy off-whites are replacing sterile minimalist palettes. These shades create emotional warmth while still looking modern and sophisticated. There is also a psychological reason behind luxurious color palettes. Darker, moodier tones create visual depth, which makes rooms feel layered and intentional. Warm neutrals make spaces feel inviting and timeless. Earth-inspired shades connect interiors to nature, creating a relaxed yet upscale atmosphere. That is why so many modern luxury homes now use sage greens, charcoal grays, clay tones, and creamy whites instead of basic builder-grade beige. Another important detail is cohesion. Expensive homes rarely use wildly different colors in every room. Instead, they follow a connected palette that flows naturally from one space to another. This consistency makes the entire home feel custom-designed rather than randomly decorated. How to Choose the Right Paint Color for Your Space Before jumping into trendy colors, it is important to understand how lighting changes paint. A color that looks gorgeous on Pinterest might look completely different inside your home. Natural sunlight, artificial lighting, ceiling height, flooring color, and even furniture materials affect how paint appears throughout the day. North-facing rooms usually have cooler light, so warmer shades like creamy beige, mushroom taupe, and earthy clay help balance the space. South-facing rooms receive warmer sunlight, which allows deeper colors like olive green or navy blue to shine beautifully without feeling too dark. This is why interior designers always test paint swatches in multiple lighting conditions before making a final decision. Furniture also plays a huge role. Warm wood flooring pairs beautifully with earthy greens, soft beiges, and taupe shades. Black hardware and modern furniture often look stunning against greige, charcoal, or muted white walls. Meanwhile, textured fabrics like linen, velvet, boucle, and leather become more visually rich when paired with layered paint tones. Another common mistake homeowners make is choosing paint purely based on trends. The goal is not just to follow what is popular. The goal is to create timeless sophistication. Expensive-looking interiors often use muted, softened versions of trendy colors rather than loud or highly saturated shades. Instead of bright green, luxury homes choose olive or sage. Instead of harsh black, they choose smoky charcoal or muted black. Small shifts in undertones make a massive difference. Here is a quick comparison of modern luxury paint tones dominating interiors right now: Paint Color Style Mood Created Best Rooms Warm Creamy White Soft elegance Living rooms, hallways Sage Green Calm and organic Bedrooms, kitchens Charcoal Gray Dramatic luxury Accent walls, offices Mushroom Taupe Cozy sophistication Bedrooms, dining rooms Dusty Blue Relaxed upscale feel Bathrooms, bedrooms Terracotta Clay Earthy warmth Dining spaces, feature walls Warm Creamy White Forget cold hospital-style white walls. Modern luxury interiors now favor creamy whites with soft warm undertones because they make spaces feel airy without feeling sterile. These shades work beautifully in almost every design style, from modern minimalist homes to classic interiors filled with natural wood textures. Recent paint trend reports show warm whites becoming one of the strongest choices for upscale interiors in 2026. Creamy white reflects light gently, which instantly makes rooms feel larger and more refined. It also creates the perfect backdrop for layered decor. Imagine warm oak flooring, linen curtains, textured rugs, and brass accents against creamy white walls. The room immediately feels custom-designed rather than plain. One of the biggest reasons designers love creamy whites is flexibility. These shades pair beautifully with almost every accent color. You can add olive green furniture, black fixtures, bronze lighting, or wooden decor without worrying about clashing undertones. For an especially luxurious effect, avoid bright white ceilings and instead use slightly softer ceiling shades. This creates a more seamless and expensive appearance. Matte or eggshell finishes also help creamy whites look richer and less reflective. Soft Greige Greige continues to dominate luxury interiors because it perfectly balances warmth and modernity. It combines gray and beige in a way that feels sophisticated, versatile, and timeless. Unlike cool gray walls that became overly common during the minimalist trend era, modern greige tones have warmer undertones that create comfort and softness. What makes greige special is its adaptability. It can appear slightly beige during warm daylight and subtly gray during cooler evening lighting. This dynamic quality adds

MOLD-IMAGE
Exterior painting

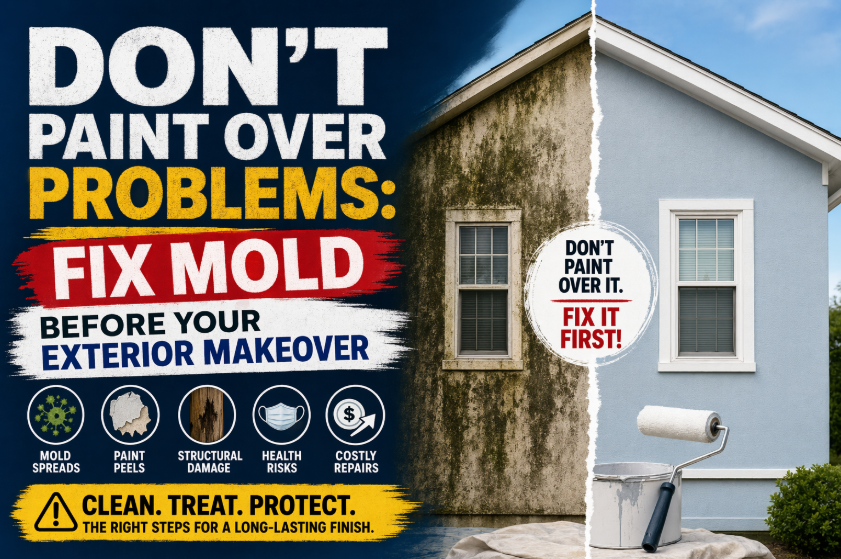
Don’t Paint Over Problems: Fix Mold Before Your Exterior Makeover

A fresh coat of paint can completely transform your home’s exterior, boosting curb appeal and protecting surfaces from weather damage. However, one of the most common and costly mistakes homeowners make is painting over mold without properly treating it first. Mold is not just a surface issue—it is a living organism that spreads beneath paint layers, causing peeling, discoloration, and even structural damage over time. If you want a long-lasting, professional-quality paint job, mold removal must be your first step. In this guide, we’ll break down why mold treatment is essential, how to properly prepare your home’s exterior, and the best practices for a durable finish. Why You Should Never Paint Over Mold Mold thrives in damp, shaded, and poorly ventilated areas. Exterior walls exposed to rain, humidity, and dust are especially vulnerable. If you paint over mold, you may face: Paint peeling and bubbling within months Mold regrowth under fresh paint layers Weak adhesion between paint and surface Health risks due to airborne spores Expensive repainting and repairs According to the U.S. Environmental Protection Agency (EPA), mold should always be removed before any surface restoration or repainting Simply covering it with paint does not kill mold—it only hides it temporarily. Step 1: Identify Mold on Exterior Walls Before starting your repainting project, carefully inspect your home’s exterior. Common signs of mold include: Black, green, or brown patches on walls Musty or damp smell near surfaces Visible growth in shaded or moist areas Discoloration around gutters or windows Pay close attention to north-facing walls or areas with poor sunlight exposure, as these are more prone to moisture buildup.   Step 2: Clean the Mold Properly Cleaning is the most important step in mold remediation. You can use: 1. Pressure Washing Ideal for light surface mold on concrete, brick, or siding. 2. Cleaning Solutions A common mixture includes: Water + bleach (1:3 ratio) Or commercial mold removers designed for exterior use The CDC recommends proper cleaning methods and protective gear when handling mold 3. Scrubbing For stubborn patches, use a stiff-bristle brush to physically remove mold from surfaces. Always wear gloves, goggles, and a mask when cleaning mold. Step 3: Let the Surface Dry Completely Moisture is the main cause of mold regrowth. After cleaning: Allow at least 24–48 hours drying time Ensure no hidden moisture remains in cracks or corners Avoid painting during humid or rainy weather Painting over damp surfaces traps moisture and leads to long-term damage. Step 4: Repair Damaged Areas Before painting, inspect the surface for: Cracks in plaster or cement Rotting wood or damaged siding Loose or flaking paint Repairing these issues ensures a smooth and durable finish. Step 5: Apply Mold-Resistant Primer A high-quality primer is essential for long-term protection. Mold-resistant primers: Seal porous surfaces Prevent moisture absorption Improve paint adhesion Reduce future mold growth This step acts as a protective barrier between the surface and the final paint layer. Step 6: Use High-Quality Exterior Paint Not all paints are created equal. Choose exterior paints that offer: Anti-fungal properties Weather resistance UV protection Long-lasting durability Silicone-based or acrylic paints are often recommended for humid environments. Step 7: Prevent Future Mold Growth Once your home is freshly painted, prevention becomes key: Improve ventilation around the house Clean gutters regularly Fix water leaks immediately Trim plants near walls to reduce shade and moisture Recheck problem areas annually The more proactive you are, the longer your paint job will last. Final Thoughts A successful exterior makeover is not just about aesthetics—it’s about preparation. Mold is one of the biggest threats to a long-lasting paint job, and ignoring it can lead to serious damage and extra costs. By properly cleaning, treating, and preparing your home’s exterior, you ensure that your investment in painting pays off for years to come.  

interior painting
Interior Painting

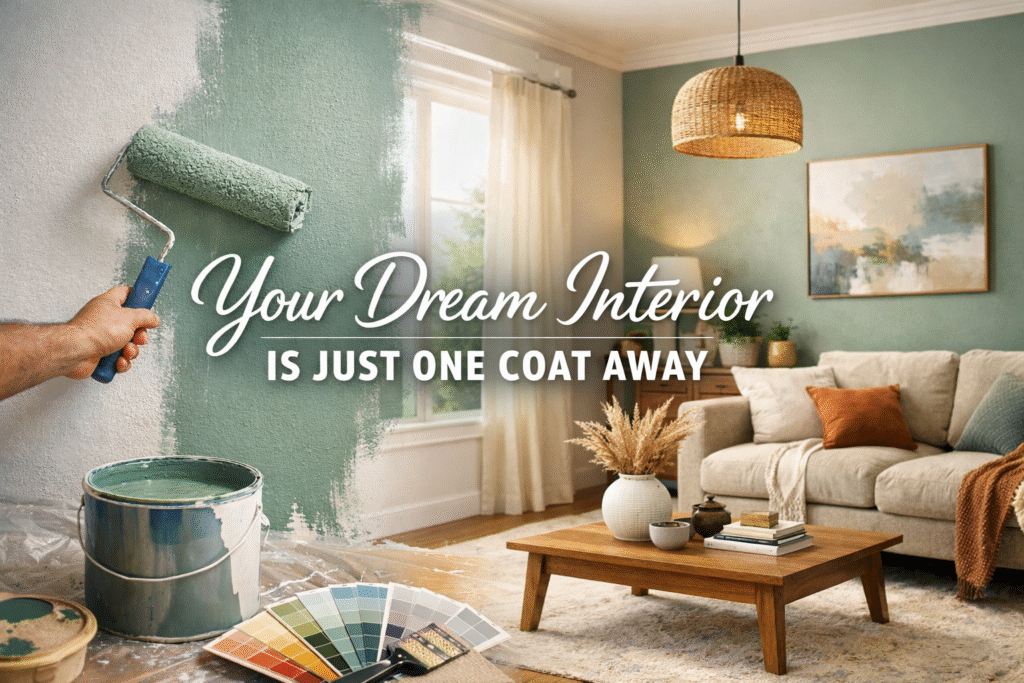
Your Dream Interior Is Just One Coat Away

Introduction: The Power of a Fresh Coat of Paint Have you ever walked into a freshly painted room and felt an instant lift in your mood? There is something undeniably transformative about a new coat of paint. Whether you want to brighten a dark living room, add warmth to a cold bedroom, or give your kitchen a modern refresh — the right interior house painting services can completely reinvent your home. At  At GRC Custom Painting, I believe that your dream interior is not out of reach. With the right colors, the right expertise, and the right approach, a stunning home transformation is truly just one coat away. In this guide, I will walk you through everything you need to know about interior house painting services — from choosing the perfect colors, to understanding why professional interior house painting services make all the difference for your home. Why Interior House Painting Services Are One of the Best Home Investments Professional interior house painting services deliver one of the highest returns on investment of any home improvement project. According to the National Association of Realtors, a freshly painted interior can add significant value to your home and make it sell faster. Here is why repainting your home’s interior is always a smart move: Instantly improves the look and feel of every room Covers wall damage, stains, and wear over time Allows you to update your home to current design trends Protects your walls from moisture, mold, and deterioration Creates a healthier living environment with low-VOC paint options Whether you are preparing your home for sale or simply refreshing your space for your family, professional interior painting is the most cost-effective upgrade you can make. Choosing the Right Colors: The Art and Science of Interior Paint Color is one of the most powerful elements in interior design. The shades you choose can make a room feel larger or smaller, warmer or cooler, energizing or relaxing. Understanding color psychology is key to making the right choices. Color Psychology in Home Design Blue tones — promote calm, relaxation, and focus; ideal for bedrooms and home offices Warm neutrals (beige, greige, taupe) — create a cozy, welcoming atmosphere in living areas White and off-white — maximize natural light, making small rooms feel larger and brighter Sage green — brings in the calming energy of nature; trending for kitchens and bathrooms Deep navy or charcoal — adds drama and sophistication to dining rooms and accent walls Interior Paint Trends for 2025 According to color experts at  According to color experts at Sherwin-Williams and Benjamin Moore, the hottest interior paint trends for 2025 include warm earth tones, biophilic greens, and moody hues that create intimate, cozy spaces. Soft terracotta, warm sand, and dusty rose accents are replacing the cool grays of the previous decade. Not sure which colors suit your space? I at  Not sure which colors suit your space? I at GRC Custom Painting offers personalized color consultations to help you find the perfect palette for every room in your home. Room-by-Room Interior Painting Guide Living Room The living room is the heart of your home and the first impression for guests. Opt for warm, inviting neutrals like warm whites, light taupes, or soft grays to create a versatile backdrop. For a bolder statement, consider a feature wall in a deep jewel tone like emerald, sapphire, or burgundy. Bedroom Your bedroom should be a personal sanctuary. Soft, muted tones — pale blues, lavender, sage, or warm whites — encourage rest and relaxation. Avoid overly stimulating colors like bright red or orange in sleeping spaces. Kitchen Kitchens benefit from bright, clean colors that reflect light and create energy. Crisp whites, soft yellows, or light greens work beautifully. If you want to make a bold statement, dark cabinetry paired with a contrasting lighter wall is an incredibly stylish choice right now. Bathroom For bathrooms, moisture resistance is just as important as color choice. Soft blues, cool grays, and spa-like whites create a clean, fresh feel. Always use paint specifically formulated for high-humidity environments. Home Office Productivity is the goal in a home office. Soft blues and greens are known to boost focus, while warm neutrals keep the space feeling inviting rather than clinical. Avoid stark white, which can cause eye strain over long work sessions. DIY vs. Professional Interior Painting: What’s the Real Difference? Many homeowners consider taking on painting projects themselves to save money. While DIY painting can work for small touch-up jobs, there are significant advantages to hiring professional interior house painting services for larger projects. DIY Painting Lower upfront cost Suitable for small areas or simple touch-ups Risk of uneven coverage, roller marks, and drips Time-consuming — a full room can take an entire weekend Risk of incorrect prep leading to peeling paint later Professional Painting (GRC Custom Painting) Flawless, even finish every time Proper surface preparation including filling, sanding, and priming Faster project completion — most rooms done in a single day Access to professional-grade paints and tools Long-lasting results that protect your walls for years The Painting and Decorating Contractors of America (PDCA) recommends hiring certified professionals for projects that involve more than one room, high ceilings, detailed trim work, or preparation for home sale. Professional painting is an investment that pays for itself in both quality and time saved. Our Interior Painting Process at GRC Custom Painting At GRC Custom Painting, we follow a meticulous, proven process that guarantees beautiful, lasting results on every project. Step 1: Free In-Home Consultation We begin with a free consultation where I personally visit your home, assess your walls, discuss your vision, and provides a detailed, transparent quote with no hidden fees. Step 2: Color Selection & Planning I help you explore paint options, review swatches in your actual lighting conditions, and select the ideal colors for each space. We take into account your existing furniture, flooring, and natural light. Step 3: Professional Surface Preparation Great painting starts with great prep. We protect your furniture

Scroll to Top