Deck Stain Colors
Blog

Deck Stain Colors: How to Choose the Right Shade for Your Home

The right deck stain color should complement your home, work with the wood’s natural tone, and suit how much grain you want to see. Before choosing a shade, consider the existing finish, sun exposure, and how a dried sample looks beside your exterior. I’m Gerry, the owner of GRC Custom Painting. I personally handle preparation and coating work for homeowners in Woodland, Davis, and Sacramento. A color chart helps narrow the options, but your own deck is where the decision needs to happen. Which Deck Stain Colors Should You Consider for Your Home? Start with a color family rather than a specific shade name. Natural golds, browns, grays, and reddish tones each create a different look. The best choice depends on the surrounding exterior and the wood beneath the stain. Natural Cedar and Honey Tones Cedar-tone and honey-colored stains bring warmth while keeping a natural wood appearance, particularly in translucent or semi-transparent finishes. They are worth considering if you like golden tones and visible grain. “Cedar tone” describes a color, not the species of wood being stained. On wood with strong red or orange undertones, the finished shade may look warmer than expected. Walnut and Rich Brown Tones Brown deck stain colors range from light walnut to deep chocolate. They can create a quiet connection with landscaping or a stronger contrast against pale siding. Check the undertones carefully. One brown may lean golden, another reddish, and another cooler or grayer. Those differences matter when the deck sits beside brick, stucco, or painted trim. Driftwood Gray and Soft Taupe Gray deck stain colors offer a muted alternative to golden and reddish wood tones. Driftwood gray can suit a restrained exterior palette, while taupe introduces some warmth. A transparent gray stain will still interact with the wood’s original color. It may look different on pale pine, reddish cedar, and darker weathered boards. Redwood and Mahogany Tones Redwood and mahogany shades create a richer, warmer appearance. They can make the deck a noticeable part of the exterior without using a fully opaque finish. Compare them against nearby masonry first. A strong red stain beside red brick can produce more warmth than you intended. How Do You Match Deck Stain Colors to Your House? Choose your deck color alongside the exterior features that will remain: siding, stucco, brick, roofing, and trim. Your deck should feel connected to the house, but it does not need to match it exactly. What Works With White, Cream, or Beige Exteriors? Natural cedar, honey, and walnut are useful starting points beside light exteriors. They introduce warmth and distinguish the deck from the walls. Cream and beige usually have warmer undertones than crisp white. Hold your samples beside the actual exterior so you can see whether the combination feels balanced or overly yellow. What Works With Gray or Blue Exteriors? For a gray house, consider either a coordinating gray deck stain or a warmer brown that creates contrast. Both approaches can work. Blue siding can also pair with natural wood tones. The choice depends on whether you want the deck to blend into the exterior or stand apart from it. What Works With Brick or Earth-Toned Exteriors? Look beyond the main brick color. Mortar, trim, and subtle brown or gray tones can provide useful starting points. A neutral brown may balance reddish masonry, while taupe may connect with lighter mortar. Include railings and nearby fencing in the comparison because they affect the overall view. How Does Stain Opacity Change the Color You See? Opacity describes how much a stain hides the wood underneath. The shade determines the color direction; opacity determines how strongly the wood’s natural color and grain influence the result. Transparent and Semi-Transparent Stains Translucent or transparent stains add relatively little color while leaving much of the wood visible. Semi-transparent deck stain colors introduce more pigment while retaining visible grain. These finishes depend heavily on the starting surface. The same shade can look different across wood species, older boards, and replacement boards. Manufacturer samples are useful references, but they cannot predict every deck. Semi-Solid and Solid Stains Semi-solid stains provide greater coverage while allowing some wood character to remain. Solid deck stain colors conceal much more of the original coloration and grain pattern, although surface texture can still show. Greater coverage can help create a more uniform appearance. It cannot repair rotten wood, stabilize loose boards, or correct structural problems. Those issues need attention before coating. How Do Wood Type and an Existing Finish Affect Your Choice? Your deck’s starting condition influences which colors and finishes are practical. Assess the wood and identify the existing coating before choosing a shade. Cedar, Redwood, and Pressure-Treated Wood Cedar and redwood can contribute warm natural undertones. Pressure-treated wood may have a different starting cast depending on the treatment and weathering. Stain absorption can also vary between boards. A sample on one piece may not represent the entire deck, especially where newer boards sit beside older wood. Weathered Decks and Previously Stained Boards Weathering, uneven preparation, and remaining old finish can affect the final appearance. Choosing a darker shade does not automatically solve these differences. Changing from a dark finish to a lighter or more transparent one may require substantial coating removal. A penetrating stain also needs a suitable surface; it cannot simply soak through an existing paint film. The preparation method and replacement coating must be compatible with the deck’s condition and the manufacturer’s instructions. Should You Choose a Light or Dark Deck Stain in Full Sun? Consider comfort as well as appearance when choosing between light and dark deck stain colors. Darker surfaces generally absorb more solar heat, but actual temperatures depend on the material, coating, exposure, and conditions. For an exposed deck in Woodland, Davis, or Sacramento, compare lighter brown, tan, or gray samples before committing to a very dark shade. Dark brown may provide the contrast you want, but consider how you use the deck during sunny weather. Keep heat, fading, and UV protection separate. A darker


How to Paint Kitchen Cabinets
Blog

How to Paint Kitchen Cabinets for a Smooth, Lasting Finish

To paint kitchen cabinets for a smooth, lasting finish, start by removing doors and hardware, cleaning away grease, repairing damage, and preparing the existing coating. Apply compatible primer and cabinet paint, following the manufacturer’s drying instructions between coats and before reassembly. I’m Gerry, the owner and painter behind GRC Custom Painting. I spray kitchen cabinets as my standard application method. I use a brush and roller only when a homeowner specifically requests that approach. Whichever method is chosen, careful preparation remains essential. Here’s how to approach the process, from assessing your cabinets to putting the doors back on. Are Your Kitchen Cabinets Suitable for Painting? Painting works best when cabinet doors, frames, and boxes are structurally sound. It can refresh worn-looking surfaces, but it cannot fix swollen particleboard, loose joints, or coverings that are coming away. What Should You Check on Wood, Painted, and Laminate Cabinets? Inspect areas around the sink for water damage and check door edges for lifting veneer or laminate. Resolve leaks and structural problems first. Wood cabinets can retain visible grain after painting. For a smoother appearance on oak, you may need a compatible grain filler; additional paint alone will not reliably hide deep pores. Previously painted cabinets need a firmly attached existing coating. Laminate and melamine require products approved for those surfaces, while peeling thermofoil needs assessment before painting. If your home was built before 1978, assess old coatings for lead before sanding or scraping. EPA recommends testing by a certified lead inspector or risk assessor and using lead-safe work practices where necessary. What Paint, Tools, and Workspace Do You Need? Choose a cabinet-rated coating and compatible primer, then arrange a clean, protected area where doors can dry without touching each other. Cabinet enamel is designed for demanding surfaces such as doors and trim. Check for suitability, leveling, and resistance to sticking, rather than choosing by color or sheen alone. Satin offers a softer appearance; semi-gloss reflects more light and can make surface imperfections more noticeable. Have a screwdriver, labels, hardware bags, protective coverings, degreaser, filler, abrasives, dust-removal supplies, brushes, and a suitable mini roller ready. Follow the product instructions for ventilation, protective equipment, application temperature, and humidity. Leave enough drying space to avoid stacking freshly painted parts. How Do You Paint Kitchen Cabinets Step by Step? Prepare the surface fully before applying finish coats. Cleaning, sanding, priming, and painting solve different problems, so skipping one stage can affect everything applied afterward. Step 1: Protect the Kitchen and Label the Parts Clear the working area and cover countertops, flooring, and appliances. Protect cabinet interiors that will remain unpainted. Photograph the layout, then label each door and drawer front to match its opening. Store handles, hinges, and screws in corresponding bags. Keep identification marks somewhere they will remain readable without showing after reassembly. Remove doors and detachable drawer fronts where practical. Keep paint away from hinges, drawer slides, and other moving hardware. Step 2: Clean Away Grease Before Sanding Clean cabinets thoroughly, especially above the stove, near handles, and beside the sink. Sanding first can spread contamination across the surface. Use a degreaser suitable for the existing finish, following its dilution and residue-removal instructions. Avoid saturating joints or exposed composite-board edges. Allow surfaces to dry fully. If grease remains, repeat the cleaning before moving on. Step 3: Repair Damage and Prepare the Surface Fill dents, chips, and unwanted hardware holes with a compatible repair product. Let it dry, then sand the repair level. Choose sandpaper according to the surface and coating system. Behr lists 150–220-grit abrasives for its cabinet-painting project, but this is not a universal specification. The aim on a sound finish is to reduce gloss and smooth defects without damaging veneer or shaped edges. Remove loose paint and investigate why it failed. Where oak grain needs filling, follow the filler manufacturer’s preparation instructions. Remove sanding dust thoroughly, including from corners and grooves. A surface can look clean while still holding dust that will spoil the finish. Step 4: Prime and Check the Surface Use a primer compatible with both the cabinet surface and the finish paint. Bonding primers help with adhesion on suitable challenging surfaces; stain-blocking primers control discoloration. Some products provide both functions. If the existing finish is uncertain, test the proposed system in an inconspicuous area using the manufacturer’s adhesion-testing procedure. Apply an even primer coat and allow the required drying time. Check for roughness, raised fibers, or drips. Smooth these where instructed, then remove the dust before painting. Sherwin-Williams includes adhesion testing and smoothing the primed surface in its cabinet-painting guidance. Step 5: Spray Cabinet Paint in Even, Controlled Coats I spray cabinets to achieve an even finish without brush or roller texture. Before application, protect surrounding surfaces thoroughly and confirm that the coating, spray equipment, ventilation, and protective equipment are suitable for the work. Use the coating manufacturer’s recommended equipment settings and application thickness. Test the spray pattern before coating the cabinet parts, then apply controlled, overlapping passes. Avoid allowing excess material to collect around profiles, corners, and edges. Keep doors and drawer fronts securely supported. Allow sufficient drying before turning or moving them, and protect freshly coated surfaces from dust and pressure marks. Apply the number of coats specified for the selected system. Coverage, color changes, and the required film thickness determine the final application. Spraying does not remove the need to follow minimum recoat times. Inspect between coats. Where the product instructions call for sanding, let the coating dry sufficiently, smooth imperfections carefully, and remove dust before continuing. Brushing and rolling are alternative application methods, but I use them on cabinets only when the homeowner specifically requests that finish. How Long Does Cabinet Painting Take Before You Can Reassemble Everything? Allow for multiple work sessions plus drying periods. The number of doors, repairs, workspace, application method, and product instructions determine the schedule. Avoid planning around a guaranteed one-weekend finish. Dry-to-touch, ready-to-recoat, safe-to-handle, and fully cured are different stages. Paint may feel dry while remaining vulnerable to pressure

Paint for Kitchen Cabinets
Blog, Interior Painting

Best Paint for Kitchen Cabinets: Types, Finishes, and What to Choose

The best paint for kitchen cabinets is usually a cabinet-rated enamel that creates a durable, washable finish. Benjamin Moore advance, Sherwin-Williams Emerald Urethane Trim Enamel, and INSL-X Cabinet Coat are options worth comparing. The right choice depends on your cabinet surfaces, how the paint will be applied, and the time available for drying and curing. I’m Gerry, the owner of GRC Custom Painting. I personally handle cabinet painting for homeowners in Woodland, Davis, and Sacramento. Choosing a paint matters, but so does making sure it works with the finish already on your cabinets. What Is the Best Paint for Kitchen Cabinets? A suitable cabinet paint needs to handle frequent touching, cleaning, and contact around handles and door edges. It should also level well, meaning it settles into a smoother surface as it dries. Start with products specifically intended for cabinetry. Ordinary wall paint may look acceptable initially, but it should not be assumed to offer the hardness or resistance to sticking needed on cabinet doors. There is no single winner for every kitchen. I spray kitchen cabinets as my standard method, choosing a compatible coating system suited to the surface and spray application. Preparation, finish quality, and drying and curing requirements all influence the choice. Which Cabinet Paints Are Worth Comparing? These three products are intended for cabinetry, but their formulations and instructions differ. The comparison below draws on manufacturer information rather than claiming personal testing or identical results on every surface. When Is Benjamin Moore ADVANCE Worth Considering? Benjamin Moore ADVANCE is a waterborne alkyd paint designed to cure to a hard, furniture-quality finish. Its flow and leveling characteristics make it worth considering when a smooth appearance is a priority. The practical consideration is scheduling. Water cleanup does not mean a coating is ready for another coat or regular handling as soon as it feels dry. Check the instructions for the specific ADVANCE product and allow the required time between stages. It is an option to compare when you can accommodate the coating’s working schedule rather than rushing doors back into use. When Is Sherwin-Williams Emerald Urethane Trim Enamel Worth Considering? Emerald Urethane Trim Enamel is a water-based coating intended for cabinets, doors, and trim. Sherwin-Williams describes it as producing a hard, durable finish for frequently used and cleaned surfaces, with better resistance to yellowing than traditional oil-based coatings. That makes it relevant when comparing cabinet paints for a busy kitchen, particularly when considering white or light finishes. However, durability claims do not remove the need for preparation. The existing surface, primer, application method, and curing conditions still influence the result. Follow its product instructions rather than transferring the directions from another enamel. When Is INSL-X Cabinet Coat Worth Considering? INSL-X Cabinet Coat is another cabinet-refinishing product worth comparing. Its intended use makes it a relevant alternative when assessing a coating for existing cabinet doors and other interior cabinetry.  Before choosing it, check the manufacturer’s instructions against your actual surface and existing finish. A product suitable for one prepared surface may require a different approach on another. Pay particular attention to preparation and primer requirements. Strong adhesion claims should never be interpreted as permission to paint over cooking grease, loose coatings, or damaged material. Is Water-Based or Oil-Based Paint Better for Kitchen Cabinets? The choice is more nuanced than water versus oil. Modern cabinet coatings include waterborne alkyds and other water-based enamels designed for demanding interior surfaces. ADVANCE, for example, is a waterborne alkyd. That description tells you more than simply calling it water-based. Different formulations offer different application characteristics, and cleanup instructions alone do not tell you how quickly a coating cures. Traditional oil-based coatings also have considerations, including cleanup requirements and potential yellowing. Compare the specific products rather than assuming every oil-based paint is harder or every water-based paint is less durable. For kitchen cabinets, intended use, surface compatibility, application instructions, and curing requirements are more useful selection criteria than the broad category alone. Is Satin or Semi-Gloss Better for Kitchen Cabinets? Both can work well when they are available in an appropriate cabinet enamel. The choice is partly visual: how much reflection do you want across the doors? Formulation also affects performance, so sheen is not the only measure of durability. When Does Satin Make Sense? Satin gives cabinets a softer reflection than semi-gloss. It can make minor texture and surface irregularities less noticeable while providing a finish suitable for cleaning when the product is designed for cabinetry. It is worth considering if you want the cabinet color and door design to stand out without a strong shine. When Does Semi-Gloss Make Sense? Semi-gloss creates more visible reflection, which can emphasize door profiles and decorative details. It can also highlight sanding marks, uneven grain, or application texture. When comparing paint finish types, look at samples in your kitchen lighting. Do not assume that every semi-gloss coating will outperform every satin product. Does Your Cabinet Surface Change Which Paint You Should Choose? Yes. The material and existing finish help determine the preparation and primer needed beneath the paint. A sound surface gives the coating a better starting point than one that is peeling, swollen, or coming apart. What Matters for Wood and Oak Cabinets? Wood cabinets may have an existing stain or clear finish that needs preparation before painting. Some woods and old finishes can also cause discoloration to show through light-colored coatings, making appropriate stain-blocking preparation important. Oak brings another consideration: visible grain. Paint changes the color but does not automatically fill the wood’s texture. If you want a smoother appearance, grain filling may be a separate preparation step. What Matters for Previously Painted or Laminate Cabinets? Previously painted cabinets need an assessment of the old coating. New paint cannot secure a loose layer underneath it. Laminate requires particular attention to product compatibility and adhesion. A sound, firmly attached surface is different from one with peeling edges or moisture damage. Confirm the coating system is appropriate before treating every smooth cabinet surface the same way.

Eggshell vs Satin Paint
Blog, Interior Painting

Eggshell vs Satin Paint: Which Is Better for Interior Walls?

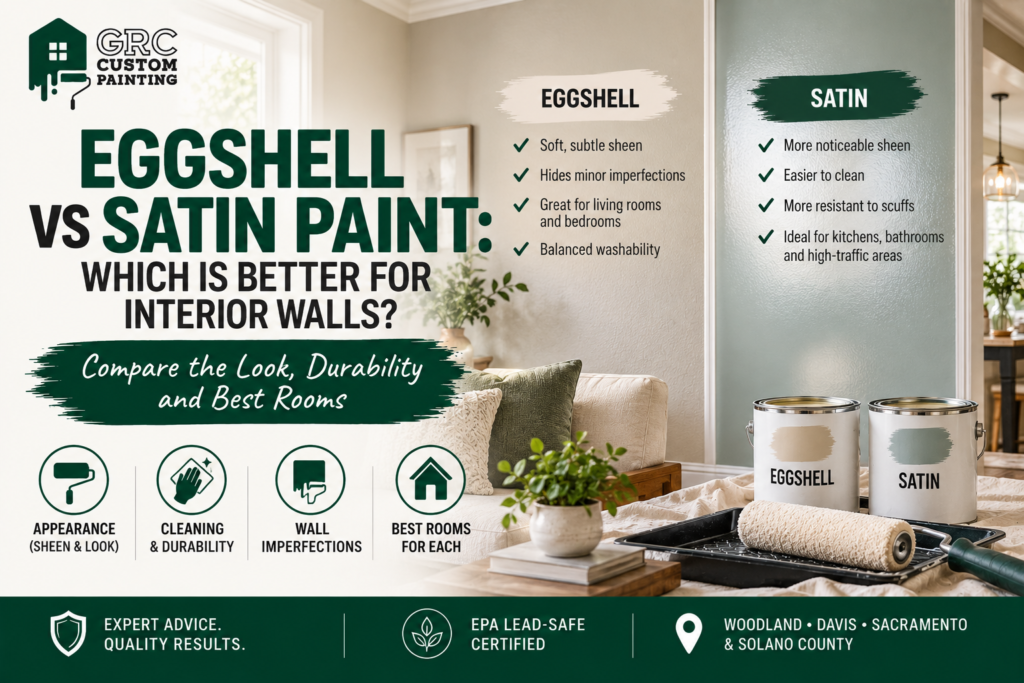
Eggshell paint is often the better choice when you want a softer appearance that makes minor wall imperfections less noticeable. Satin paint has more sheen and, within a comparable paint range, generally handles frequent cleaning better. The right choice depends on your walls, room lighting, and the specific paint, not just the finish name. I’m Gerry, the owner of GRC Custom Painting. I personally handle interior painting for homeowners in Woodland, Davis, and Sacramento, including helping them choose finishes. Before choosing between eggshell and satin, it helps to think about how you actually use the room. What Is the Difference Between Eggshell and Satin Paint? The main difference is sheen: how much light the dried paint reflects. Eggshell usually has a subtle glow, while satin has a more noticeable shine. Both can work on interior walls, but they create different appearances and maintenance trade-offs. What Is Eggshell Paint? Eggshell paint is a low-sheen finish named after the gentle luster of an eggshell. It reflects some light without giving walls a strongly glossy appearance. That makes it useful when you want a soft finish with some washability. It can also make small surface irregularities less noticeable than a shinier coating would. Eggshell is a finish, not a color, so it is available in far more than white or cream. What Is Satin Paint? Satin paint typically reflects more light than eggshell, giving walls a soft, visible sheen. It is often considered for spaces where fingerprints, splashes, and regular wiping are part of everyday life. Finish names are not perfectly consistent across manufacturers. Compare the actual products rather than assuming one brand’s satin will look exactly like another’s. How Do Eggshell and Satin Compare on Interior Walls? The differences become clearer across a whole wall than on a small paint chip. Appearance, cleaning, and future touch-ups are the three practical considerations worth weighing before you repaint. Which Finish Shows Wall Imperfections More? Satin generally makes surface imperfections more noticeable because it reflects more light. Uneven patches, roller marks, and differences in wall texture can stand out, especially when daylight falls across the surface from the side. Eggshell’s lower sheen is usually more forgiving. It can be a sensible choice for walls with minor irregularities that you do not want to emphasize. However, neither finish repairs the surface underneath. Holes, loose paint, and poorly blended patches still need preparation. Choosing eggshell should not mean skipping repairs that affect the finished result. Which Finish Handles Cleaning and Scuffs Better? Satin often offers better washability than eggshell within the same paint range. That can be helpful on walls you regularly wipe around light switches, dining areas, or busy passageways. But washability and scuff resistance are different. One describes how well a coating tolerates cleaning; the other concerns marks caused by contact. The product’s formulation matters alongside its sheen. A quality eggshell paint can be suitable for busy rooms. Benjamin Moore, for example, identifies eggshell finishes as appropriate for family rooms and hallways. It would be misleading to rule out eggshell simply because a room gets regular use. Which Finish Is Easier to Touch Up? Eggshell can be more forgiving of small touch-ups because differences in reflection are less obvious. Satin repairs may catch the light and appear as a shinier or duller patch, even when the color matches. Neither finish guarantees an invisible repair. Paint age, surface texture, application method, and the original product all affect how well a touch-up blends. When a repair remains noticeable, repainting the wall from corner to corner may give a more consistent appearance than repeatedly adding paint to the same spot. Should You Choose Eggshell or Satin for Each Room? Room names are a starting point, not a fixed rule. A quiet bedroom and a child’s bedroom may need different things from their paint. Consider cleaning frequency, wall condition, and how much sheen you want to see. Which Is Better for Living Rooms and Bedrooms? Eggshell is a good option when you prefer a soft appearance with limited glare. It can work particularly well where large windows make reflected light and wall texture noticeable. Satin may suit a bedroom or living area where walls need frequent wiping. The trade-off is a more visible sheen, so consider whether you like that appearance across a large surface. For either finish, check the product’s cleaning guidance rather than assuming all paints with the same label perform equally. Which Is Better for Hallways and Busy Family Spaces? Hallways collect fingerprints and marks from bags, furniture, and pets. Satin can be useful where repeated cleaning is likely. However, a washable eggshell paint may be a better balance if the walls are uneven or you prefer less reflection. A product formulated for scuff resistance may also be worth considering. Think about the problem you need to solve. Frequent surface dirt, contact marks, and damaged drywall are different issues; choosing a shinier paint does not automatically solve all three. Which Is Better for Kitchen and Bathroom Walls? Satin is often considered for kitchen and bathroom walls because many satin products tolerate regular cleaning. Still, the finish name alone does not establish whether a coating suits a humid room. Choose a paint intended for the conditions and follow its application instructions. Some lower-sheen products are specifically formulated for moisture-prone spaces, so higher gloss is not the only option. Ventilation matters too. Paint cannot correct an ongoing leak or persistent condensation, regardless of how shiny the finish looks. How Can You Choose the Right Finish Before Repainting? Choose by looking at the wall, its lighting, and its cleaning needs together. Then compare suitable products in the finish you are considering. Check the walls during daylight and with the lights you normally use at night. Light falling across a wall can reveal patches and texture that are less obvious when you look straight at it. If possible, compare samples of the same color in the actual eggshell and satin products. A color sample supplied in a different sheen

Interior Painting
Blog, Interior Painting

How to Prepare Your House for Interior Painting?

Most interior painting prep takes one to two days, and the goal is simple: create enough clear space for me to move, set ladders, and paint efficiently without stopping constantly to work around clutter. Here is the honest division of labor. You handle moving small items and removing wall décor. I handle large furniture, floor protection, masking, and all wall prep myself, that is part of my job and where quality shows up. I am Gerry, and I have been doing interior painting around Woodland, Davis and Sacramento for twenty-five years. At GRC Custom Painting I handle every step of the technical prep myself, so here is what you actually need to do beforehand to make the first day run smoothly. What Should You Remove Before Interior Painting? Wall art, photos, mirrors, curtain hardware, small furniture along walls, and any valuables or fragile items should come down before I arrive. This is not complicated work, and it takes you far less time than it takes me to work around it on the first day. Every minute I spend asking “should I move this?” is a minute I am not painting. The difference between a smooth first day and one that stalls is usually this single detail clearing the walls and small items beforehand. Removing Wall Art, Mirrors and Shelving Framed photos, mirrors, floating shelves, wall clocks, mounted décor, and curtain rods attached to paintable walls all need to come down. Store the mounting hardware in a labelled plastic bag taped to the back of each item. When painting is finished, you can hang everything right back in the same spot. Clearing Window Treatments Curtains, blinds, shades, valances and anything else hanging from a window should go down before I start. It protects the coverings from dust and paint, and it opens the room to light, which makes my work faster and easier to see clearly. Protecting Valuables, Antiques and Fragile Items Anything irreplaceable, sentimental, or breakable should be moved to a room not being painted or stored carefully in a closet. I work carefully, but accidents happen when ladders and extension poles are moving through rooms. Do not leave collectibles, wedding gifts, antique furniture or anything you could not replace sitting in the work zone. A quick move saves stress later. Clearing Small Furniture and Personal Items Side tables, ottomans, floor lamps, baskets, pet beds, shoe racks, humidifiers — anything small enough to move yourself should go. Leave the sectional or bed where it is; I will shift those to the centre and cover them. Small clutter makes a big difference in how fast I can move and set up my equipment. What About Large Furniture and Floors? I move and cover large furniture myself as part of my prep. You do not need to do this. Heavy pieces like sofas, beds, dressers, and dining tables get shifted to the centre of the room and protected with plastic sheeting. That is my job, and I have the equipment and technique to do it safely without damaging your furniture or flooring. What speeds things up is everything else being out of the way first. Keep floors clear of items so I can lay drop cloths and protect the surface before anything else happens. The smoother the path through a room, the faster I can set up and start painting. If you have a staging area in another room, a pile of small furniture, the contents of shelves, window treatments, that is genuinely helpful and saves time on the first morning. Should You Clean Your Walls Before Painting? No, and please do not. One of the common mistakes homeowners make is pre-cleaning walls or attempting small repairs. I need to assess the walls myself, and old repairs or cleaning methods interfere with my professional process. I will clean the surfaces I am painting as part of my prep. That includes removing dust, chalky residue, and any buildup that would affect adhesion. If you clean first, I still clean again, and you have doubled the work for no reason. The one exception is very dirty surfaces in high-traffic areas like kitchen walls. If they are visibly greasy, you can wipe them down with water and a soft cloth. Do not use aggressive cleaners. Small holes, cracks, water stains and dents I will handle during my prep work. That is where the difference between a quick paint job and a quality one shows up. Wall repair done wrong shows through the paint or fails within months. I assess each surface and match my repair method to the substrate and my paint system, which is why I handle it myself rather than asking homeowners to patch beforehand. How Do Pets, Electronics and Climate Fit In? Three practical things are worth planning around, especially during a multi-day interior painting project. Pets During Painting Let me know upfront if you have dogs or cats. An animal in the house during work is manageable, but it needs planning. Painters moving in and out, doors open to bring equipment, drop cloths and tarps, these can stress a pet. Many clients prefer to arrange pet care for the painting days. I will give you specific guidance when I confirm the start date, so the work does not disrupt your animals or interfere with the job. Electronics and Plugs Unplug any devices, chargers or extension cords in rooms being painted. Paint dust lands on everything, and wet paint near electronics creates hazards. It also clears the walls and makes masking easier for me. Clearing these small items makes a measurable difference on the first day. Central Valley Heat and Humidity Summers here are dry and hot, which actually helps interior paint dry faster than it would in humid regions. Ventilation still matters cracking windows helps the process along. Unlike humid-climate timelines many painters use, I do not need to build extra waiting time between coats here. It is one of the genuine advantages of the Central Valley climate, and it

How Long Does It Take to Paint a House Interior
Blog

How Long Does It Take to Paint a House Interior?

Most people asking this are planning around something, a move-in date, guests arriving, or how many days the house will be upside down. The short answer for a standard three-bedroom home is roughly five to seven working days for walls, and closer to eight to twelve if ceilings, trim and doors are included. Now the part most articles leave out. Nearly every timeline you will find online assumes a crew of two or more painters working in parallel. I work alone, so the numbers below are one-painter numbers, the honest version rather than a figure I could not actually hit. I am Gerry, and I have been doing interior painting around Woodland, Davis and Sacramento for twenty-five years. At GRC Custom Painting I prep, cut in, roll and inspect every room myself, so here is what that actually looks like on a calendar. How Long Does a Whole House Interior Take? It depends far more on the condition of your walls than on square footage, which is why online estimates are so often wrong. For a single room or a small apartment, plan on one to two days. For a standard three-bedroom home of around 1,500 to 1,800 square feet, walls only with sound drywall and light prep, five to seven working days is realistic. Add ceilings, trim and doors throughout and that stretches to eight to twelve days. Larger or multi-storey homes with vaulted ceilings and detailed millwork can run two to three weeks. Those are working days, not calendar days. A job starting Thursday finishes the following week. If you have read that a 2,000 square foot house takes three to five days, that figure comes from a two-person crew working in parallel. It is not a fair comparison, and I would rather say so up front than quote you someone else’s schedule. How Long Does It Take to Paint a Single Room? The room is the useful unit here, because whole-house timelines are really just rooms added together plus hallways and stairwells. Walls Only A standard twelve-by-twelve bedroom with sound walls, two coats and light prep takes me about a day. That day is not all rolling. Furniture gets moved and covered, drop cloths go down, nail holes get patched and spot primed, edges get masked. Then cutting in the perimeter by brush, the slow part, before a roller touches the wall. Two coats means waiting between them. The first has to reach its recoat window before the second goes on, and rushing that shows in the finish. Adding Ceilings, Trim and Doors This is where schedules actually go, and most people underestimate it badly. Ceilings add meaningfully. Working overhead is slower, drips are likelier, and cutting around light fixtures and vents takes care. Trim is the bigger one. Baseboards, window casings and door frames are almost entirely brushwork, and brushwork does not scale the way rolling does. Full trim can roughly double the time for a room. Doors add their own block, each needs both faces, the edges, and drying time before it closes. Walls are the fast part of interior painting. Everything else is where the days go. What Actually Takes Up the Time? Rolling paint is the predictable part of this job. Everything around it is the variable. Moving and protecting furniture comes first, and in a lived-in home that is never quick. Then patching, sanding and spot priming, which depends entirely on what the walls have been through. Masking follows, and doing it properly takes longer than people expect, it is the difference between sharp lines and a job that looks rushed. Then waiting. Recoat times are not negotiable, and neither is letting patches dry before priming. Here is the honest version: two identical rooms can be a full day apart based purely on wall condition. Nail holes and old anchor points are quick work. Cracked plaster, water staining, or a bad repair from a previous owner are not. That is why I would rather look at the walls than guess. If you are unsure what shape yours are in, signs your house needs repainting covers what to look for. Why Does a One-Painter Timeline Look Different? Because I am not going to quote you a crew’s schedule and then show up alone. A two-person crew genuinely finishes faster. They work in parallel, one cuts in while the other rolls, one starts prepping the next room while the other is still finishing. That is a real advantage and I am not going to pretend otherwise. Working solo takes longer on the calendar. What you get in exchange is consistency. The same person preps every wall, cuts in every edge and checks every room. There is no variation between what one painter did on Monday and what someone else did on Thursday, because there is no someone else. No subcontractors either, and no rotating faces coming through your house. There is a practical scheduling upside people rarely think about. Working alone, I finish one room properly before opening the next.  A crew often has the whole house in pieces at once, which is faster overall but means more of your home is unusable at the same time. If that trade-off matters to you, working with an owner-operated painter goes into it further. Does Central Valley Weather Affect How Long It Takes? More than you would expect for indoor work, and for once our climate helps. Recoat times depend on how fast paint releases moisture, and that is driven by humidity. Our summers are hot and dry, which means interior paint reaches its recoat window faster here than it would in a humid climate. A lot of the timelines published online are written for the Southeast or the Pacific Northwest, where painters build in waiting time we simply do not need. If you have read that you must leave four to six hours between coats, that is often a humid-climate number. Winter runs the other way. Windows shut, heating on, and moisture with nowhere

Scroll to Top